How to Lay Pavers Over an Existing Concrete Patio: The Complete 2026 Guide
Reading time: 14 minutes
You’ve been staring at that cracked, stained concrete slab for three summers now, haven’t you? Maybe it’s got that classic 1990s aggregate finish that was stylish once upon a time, or maybe it’s just been battered by freeze-thaw cycles until it looks more like a fault line than a patio. The good news? You don’t have to jackhammer it out. Laying pavers over an existing concrete patio is one of the smartest, most cost-effective outdoor renovation moves you can make — and in 2026, with a boom in outdoor living spaces driving a 22% increase in hardscaping projects across North America, it’s never been more popular.
This guide will walk you through every phase — from evaluating your concrete base to sealing your finished surface — with the kind of precision that separates a weekend project that lasts 30 years from one that shifts and cracks before the following spring.
Table of Contents
- Why Overlay Instead of Remove?
- Step 1 — Assessing Your Existing Concrete
- Step 2 — Choosing the Right Pavers
- Step 3 — Tools and Materials You’ll Need
- Step 4 — Preparing the Concrete Surface
- Step 5 — Laying the Pavers
- Step 6 — Jointing, Sealing, and Finishing
- Common Challenges and How to Beat Them
- Frequently Asked Questions
- Your Patio Transformation Roadmap
Why Overlay Instead of Remove?
Let’s settle this debate right up front. Concrete demolition is loud, expensive, and creates a significant amount of construction waste. According to the National Concrete Pavement Association, removing a 400-square-foot concrete patio generates roughly 4,500 to 5,500 pounds of debris — most of which ends up in a landfill. In contrast, overlaying preserves that slab and uses it as a premium base layer.
From a cost standpoint, full removal and replacement of a standard 300–400 sq. ft. patio in 2026 averages between $4,800 and $9,200 depending on region, labor costs, and disposal fees. A paver overlay of the same space? Typically $1,800 to $4,500, including materials and professional labor — or significantly less if you’re doing it yourself.
The caveat: not every concrete slab is a good candidate. That’s exactly where we start.
Step 1 — Assessing Your Existing Concrete
What Makes a Slab “Good Enough” to Build On?
Think of your concrete patio as a foundation. If the foundation is compromised, anything you build on top will inherit those problems. Before you buy a single paver, spend an afternoon with a keen eye and a few simple tools.
Look for these green lights:
- Surface cracks narrower than ¼ inch (hairline cracks are fine)
- A mostly level slab — no more than ½ inch variance across 10 feet
- No evidence of significant heaving or sinking (more than 1 inch differential)
- Solid edges with no major crumbling or spalling
- Adequate drainage slope (ideally 1–2% grade away from your house)
Red flags that mean you need repair before overlaying:
- Cracks wider than ½ inch, especially those running diagonally from corners
- Sections that visibly rock or feel hollow when you walk on them
- Evidence of tree root intrusion beneath the slab
- Persistent pooling water that doesn’t drain within 30 minutes after rain
- Severe frost heave (common in USDA Plant Hardiness Zones 3–6)
The Hammer Test — A Simple Diagnostic Tool
Walk your entire slab with a rubber mallet or the handle of a regular hammer and knock firmly every 18 inches in a grid pattern. A solid, high-pitched sound means the concrete is intact and bonded to its substrate. A dull, hollow thud means there’s delamination or a void beneath — a problem that needs addressing before you lay anything on top.
Pro Tip: Mark hollow areas with chalk so you can track how widespread the damage is. If more than 30% of your slab sounds hollow, the economics of overlay versus replacement shift considerably.
Quick scenario: Imagine a homeowner in Columbus, Ohio — let’s call her Maria — discovered in spring 2025 that about 15% of her 350-square-foot patio slab had hollow sections near the edges. Rather than scrapping the entire project, she filled those voids with a hydraulic cement injection kit, waited 72 hours for curing, and proceeded with her paver overlay. The result? A stunning herringbone brick surface that’s been rock-solid through one full Ohio winter.
Step 2 — Choosing the Right Pavers
The paver market in 2026 is richer than ever. From traditional clay brick to cutting-edge porcelain slabs, the choices can feel overwhelming. Here’s how to think through them strategically.
Paver Types: A Side-by-Side Comparison
| Paver Type | Cost per Sq. Ft. (2026) | Durability | DIY Friendliness | Best For |
|---|---|---|---|---|
| Concrete Pavers | $3–$8 | High | ★★★★★ | Most climates, budget projects |
| Natural Bluestone | $12–$22 | Very High | ★★★☆☆ | Premium aesthetics, resale value |
| Clay Brick | $6–$14 | Very High | ★★★★☆ | Traditional/historic homes |
| Porcelain Slabs | $15–$35 | Exceptional | ★★☆☆☆ | Modern design, low maintenance |
| Travertine | $10–$25 | High | ★★★☆☆ | Warm climates, Mediterranean style |
Thickness matters enormously when overlaying. You need pavers that are at least 1.5 inches thick for a concrete overlay application. Thinner pavers (common in some porcelain formats at ¾ inch) require a mortar-set installation rather than a standard sand-set approach and are less forgiving of any surface imperfection in the underlying slab.
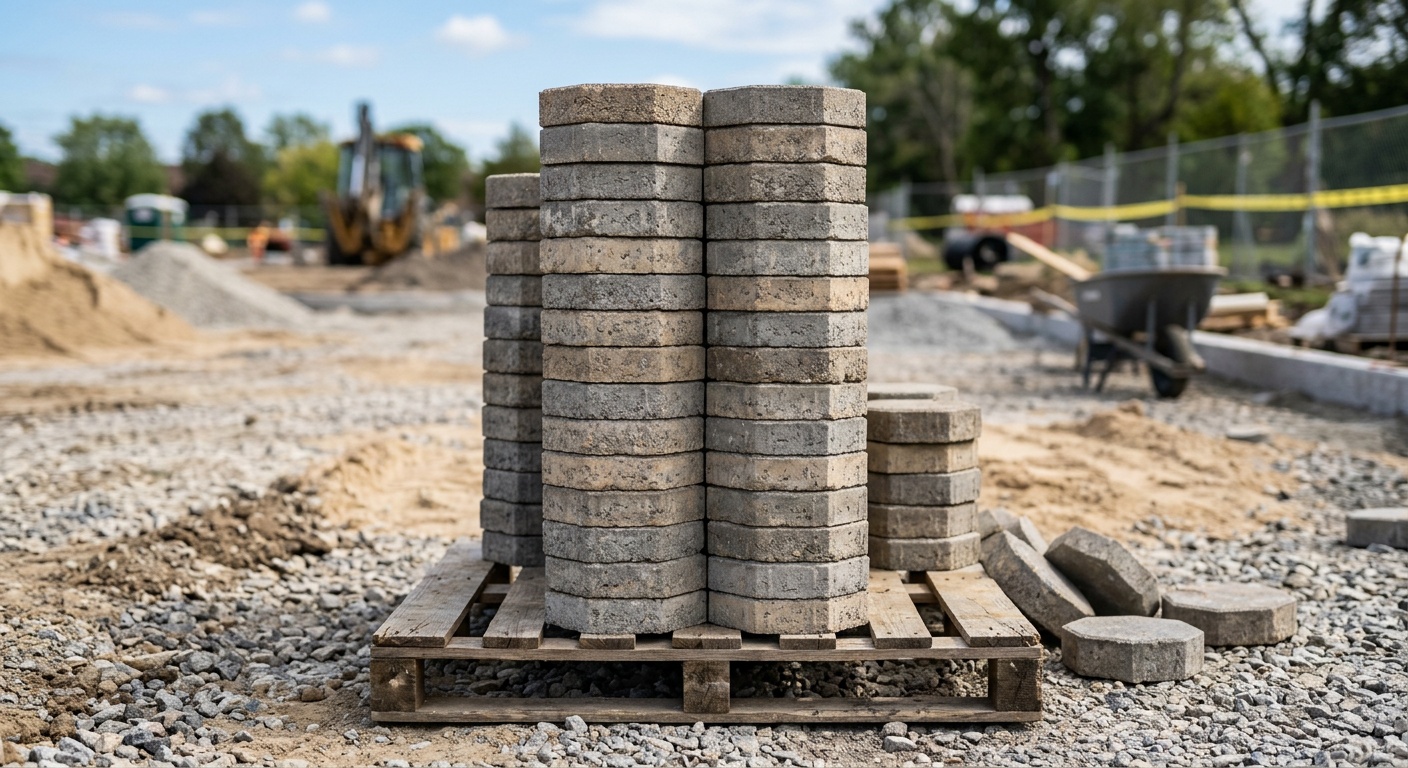
For most DIYers in 2026, standard concrete interlocking pavers at 2–3/8 inch thickness offer the best combination of price, availability, and ease of installation. Brands like Belgard, Unilock, and Techo-Bloc have expanded their product lines significantly, offering textures that convincingly mimic natural stone at a fraction of the cost.
Step 3 — Tools and Materials You’ll Need
Gathering the right tools before you start is non-negotiable. Running to the hardware store mid-project on a hot Saturday afternoon is a productivity killer. Here’s your complete list:
Tools:
- Tape measure and marking chalk
- Rubber mallet (for seating pavers)
- Plate compactor (rent if you don’t own one — typically $65–$90/day in 2026)
- Wet saw or angle grinder with a diamond blade (for cutting pavers)
- Level and 10-foot straightedge
- Screed pipes (1-inch diameter conduit works perfectly)
- Push broom
- Garden hose with spray nozzle
- Knee pads (trust us on this one)
- Safety glasses and dust mask
Materials (for a typical 300 sq. ft. patio):
- Pavers — order 10% extra for cuts and waste
- Coarse bedding sand — approximately 1 ton per 100 sq. ft. at 1-inch depth
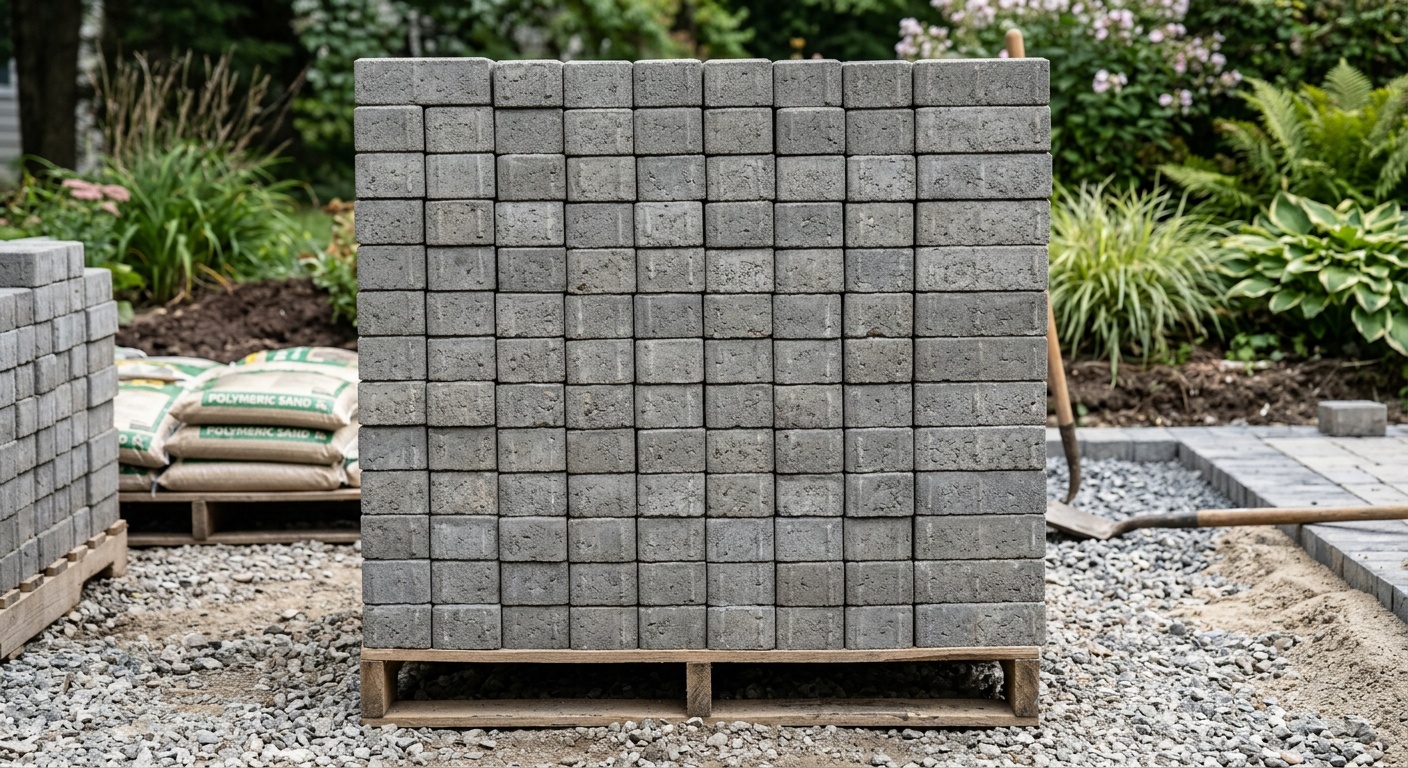
- Polymeric sand — for filling joints (2–3 bags per 100 sq. ft.)
- Concrete crack filler or hydraulic cement (for prep)
- Paver edge restraints and spikes
- Paver sealer (optional but recommended)
Step 4 — Preparing the Concrete Surface
Preparation is where most DIY overlay projects succeed or fail. Skipping steps here is how you end up with shifting pavers eighteen months down the road.
1. Clean the slab thoroughly. Pressure-wash the entire surface at 2,500–3,000 PSI. Remove any oil stains, algae, or moss. If you have oil stains, apply a concrete degreaser and scrub with a stiff bristle brush before rinsing.
2. Fill all cracks. Use a concrete crack repair caulk or an elastomeric filler for cracks up to ¼ inch. For wider cracks, use hydraulic cement or a two-part polyurethane filler. Let everything cure according to manufacturer specs — typically 24–48 hours.
3. Correct low spots. Any depression greater than ½ inch should be leveled with a concrete patching compound. Feather the edges so you’re not creating a raised bump that will affect your paver level.
4. Address drainage. This is critical. Your overlay will raise the patio surface by 2.5 to 4 inches (bedding sand plus paver thickness). Make sure this doesn’t redirect water toward your home’s foundation. You may need to extend downspout diverters or add a channel drain at the patio’s lower edge.
5. Check door clearances. Raise a level up to any doorways that access the patio. Confirm you’ll still have adequate clearance after adding paver height. A standard door threshold has about 1.5 to 2 inches of clearance. If it’s tight, you may need to trim the door bottom or choose thinner pavers set in mortar.
Step 5 — Laying the Pavers
Installing the Bedding Layer
Unlike a traditional ground-level paver installation, you’re not laying on gravel and compacted soil — you have a concrete slab doing that job. Your bedding layer here is purely for leveling and creating a cushion that allows slight adjustment.
Set your 1-inch diameter conduit pipes across the concrete surface approximately 6 feet apart and parallel to each other. Fill between them with coarse bedding sand (not fine play sand — it compacts poorly). Use a straight 2×4 screed board across the pipes to level the sand to a consistent 1-inch depth.
Remove the conduit pipes carefully once you’ve screeded a section, and fill those channels with sand, smoothing gently.
Important: Do not compact or walk on the screeded sand. Move your kneeling board (a piece of plywood works perfectly) as you progress so you never disturb the freshly leveled surface.
Laying the Pattern
Start from a straight reference edge — usually the house wall or an established straight edge of the patio. Snap a chalk line perpendicular to this wall to give yourself a reliable right-angle starting guide.
Lay pavers from the corner outward, checking level every 6–8 pavers with your straightedge. Tap each paver down gently with your rubber mallet — you’re seating it, not hammering it into submission. Maintain consistent joint spacing using plastic paver spacers (typically 1/8 to 3/16 inch) to keep your pattern even.
Pattern recommendations by paver shape:
- Running bond (brick pattern): Easiest for beginners, excellent for rectangular spaces
- Herringbone (45° or 90°): Superior interlocking strength, slightly more cutting required
- Basketweave: Classic look, requires consistent paver sizing
- Random ashlar: Premium natural stone aesthetic, requires careful planning
Real-world example: A homeowner in Portland, Oregon documented his 2025 paver overlay project on a popular DIY forum. He chose a 45-degree herringbone pattern in charcoal concrete pavers for a 280-square-foot patio. The project took two weekends, with the first weekend devoted entirely to prep and repair. His total material cost was $1,240, compared to a contractor quote of $4,800 for the same work. The key to his success? Renting a laser level for $45 to establish his reference grades before screeding.
Cutting Pavers to Fit Edges
You’ll inevitably need to cut pavers to fit along edges, around posts, or to complete patterns. A wet saw rented from your local tool rental shop makes clean, precise cuts. An angle grinder with a diamond blade also works, though it produces more dust and slightly rougher cuts.
Measure and mark each cut individually rather than assuming the pattern is perfectly symmetrical. Walls, posts, and existing structures are often slightly out of square. Cut your border pieces and leave them in place unset until you’re ready to finalize that section.
Step 6 — Jointing, Sealing, and Finishing
You’ve laid every paver. Now comes the critical step that locks everything together and determines how long your work lasts.
Polymeric sand is your best friend. Unlike regular sand, polymeric joint sand contains binders that activate with water to form a semi-rigid joint. This prevents ants and weeds from colonizing the gaps and significantly reduces joint erosion. In 2026, the newer-generation polymeric sands from brands like Alliance Gator and SEK Surebond have dramatically improved their flexibility formulas, reducing the cracking issues that plagued earlier products in freeze-thaw climates.
Application steps:
- Ensure paver surface is completely dry (wait at least 24 hours after any rain)
- Pour polymeric sand over pavers and sweep into joints with a push broom
- Run a plate compactor over the entire surface to seat pavers and help sand settle into joints
- Sweep additional sand into joints and repeat compaction
- Blow off excess sand from paver surfaces with a leaf blower on low
- Mist the entire surface gently with water (do NOT flood) to activate the binding agents
- Allow to cure for 24–48 hours before foot traffic, 72 hours before furniture
Sealing (optional but smart): A penetrating paver sealer adds UV protection, enhances color depth, and makes the surface far easier to clean. Wet-look sealers provide a high-gloss finish; matte sealers maintain a natural look. Apply sealer only after polymeric sand has fully cured — typically 7 days. Reapplication is typically needed every 3–5 years.
Common Challenges and How to Beat Them
Challenge 1: Uneven Paver Heights (“Lippage”)
This is the number one complaint in DIY overlay projects. Lippage occurs when adjacent pavers sit at slightly different heights, creating trip hazards and an unprofessional appearance.
Solution: The most common cause is inconsistent bedding sand depth. Invest extra time in your screeding process. Use a laser level rather than a basic bubble level for larger patios — the rental cost is negligible compared to the rework. If you notice lippage after initial laying, it’s not too late: you can still lift individual pavers, add or remove sand, and re-seat them before the polymeric sand goes down.
Challenge 2: Drainage and Pooling Water
Concrete overlays can create drainage problems if not planned carefully. Water that once ran off the slab may now pool against house walls or in low sections.
Solution: Before laying your bedding sand, use a long level across the full width of the patio to understand your existing slope. Aim to maintain or improve the original 1–2% grade (about 1/8 inch per foot) running away from the structure. If you have a low-slope problem area, a channel drain recessed into your patio edge can capture and redirect water effectively. Several 2026 paver manufacturers, including Techo-Bloc, now offer specialty drainage pavers with channels integrated into their design for exactly this purpose.
Challenge 3: Frost Heave in Cold Climates
If you’re in a northern climate (Zones 3–6), you know the destructive power of freeze-thaw cycles. Even over a concrete slab, frost can work its way into joints and under pavers over time.
Solution: Use polymeric sand specifically rated for freeze-thaw climates — the label will specify this. Ensure your drainage is impeccable, since water infiltration is what causes most frost damage. Some installers in extreme northern climates add a thin layer of ASTM C332 lightweight aggregate beneath the bedding sand to improve drainage and insulation. Keep joints fully packed with polymeric sand — don’t let them erode and become hollow channels for water infiltration.
Paver Overlay Project Complexity Chart
How do the key phases of a paver overlay project compare in terms of time and effort? Here’s a visual breakdown:
Time & Effort by Project Phase (% of total project)
Note: Percentages reflect a typical DIY timeline. Professional crews compress these phases significantly through equipment and experience.
Frequently Asked Questions
Can I lay pavers directly on concrete without sand?
Technically, yes — but it’s not recommended for most applications. Setting pavers directly on concrete (mortar-set method) creates a rigid, bonded surface that’s difficult to repair if individual pavers crack or become damaged. The bedding sand layer serves as a crucial leveling medium and allows the paver surface to flex slightly without cracking under thermal expansion and contraction. That said, for very thin porcelain pavers (under 1 inch) or in areas with freeze-thaw issues where flexibility is needed, a mortar-set approach with appropriate flexible mortar is sometimes the right call. Consult with a hardscaping professional before choosing this route.
Will laying pavers over concrete cause drainage or flooding problems?
Only if you don’t plan for it. Adding 2.5 to 4 inches of height to your patio surface changes how water interacts with adjacent landscaping, doors, and foundation walls. Before you start, assess where water currently flows during heavy rain and map out where it will flow after the overlay raises the surface. Install edge restraints that allow water passage underneath, ensure your patio retains its slope away from the house, and consider adding a linear channel drain at the lower edge of the patio if you’re concerned about runoff. These simple precautions prevent the majority of drainage issues homeowners encounter.
How long will a paver overlay over concrete last?
A well-installed paver overlay on a structurally sound concrete base can last 25 to 40 years with reasonable maintenance. The concrete beneath essentially acts as a permanent base, eliminating the most common failure point in traditional paver installations (base material movement). The pavers themselves — particularly clay brick and natural stone — have virtually indefinite lifespans. Concrete pavers typically carry 25–30 year manufacturer warranties in 2026. Regular joint sand replenishment every 5–7 years, occasional resealing, and prompt repair of any cracked or settled pavers are the keys to maximizing your overlay’s lifespan.
Your Patio Transformation Roadmap: From Cracked Slab to Stunning Surface
You’ve now got everything you need to tackle this project with confidence. Let’s distill it into a clear action plan so you can move from planning to pavers with momentum:
Your Step-by-Step Implementation Checklist:
- ✅ Week 1: Walk your slab with a hammer, document all cracks and hollow sections, measure your patio dimensions, and calculate paver quantities (area × 1.10 for waste)
- ✅ Week 1–2: Choose your paver style and order materials; rent or purchase tools; source polymeric sand and edge restraints
- ✅ Weekend 1: Complete all surface preparation — cleaning, crack filling, leveling, and drainage assessment
- ✅ Weekend 2: Install edge restraints, screed bedding sand, and begin paver laying from your reference corner
- ✅ Weekend 3: Complete paver laying, cut all border pieces, apply polymeric sand, compact, and activate with water
- ✅ 2 weeks later: Apply paver sealer once polymeric sand has fully cured
In 2026, outdoor living spaces are no longer just a seasonal luxury — they’re a genuine extension of the home that adds measurable resale value, with the American Society of Landscape Architects reporting an average ROI of 80–150% on quality hardscaping improvements. Your cracked concrete patio isn’t a problem; it’s an opportunity waiting for a plan.
So here’s the question worth sitting with: In five years, do you want to look out at that same tired slab, or do you want to be hosting on a surface you’re genuinely proud of? The tools, the knowledge, and the weekend are all within reach. The first step is that hammer test.