How to Patch Holes in Wood Floors Before Refinishing: The Complete 2026 Guide
Reading time: 14 minutes
You’ve pulled back the rugs, moved the furniture, and there they are — nail holes, gouges, cracks, and mystery divots staring back at you from your hardwood floor. Before you reach for that orbital sander, those imperfections need to be addressed. Patch them poorly, and you’ll sand right through your repairs or end up with blotchy, uneven staining. Patch them right, and your refinished floor will look like it just came out of a furniture showroom.
Here’s the straight talk: patching wood floors before refinishing isn’t just about filling gaps — it’s about matching texture, grain, and density so repairs become invisible. That takes the right products, the right technique, and a clear understanding of what each type of damage actually needs.
Whether you’re tackling a 1920s craftsman bungalow with century-old nail holes or a 2010s suburban home with pet-damaged oak planks, this guide walks you through every step with precision. Let’s turn those battle scars into a floor worth showing off.
Table of Contents
- Why Patching Before Refinishing Actually Matters
- Identifying Your Floor Damage: Not All Holes Are Equal
- Choosing the Right Wood Filler for Your Project
- Step-by-Step Patching Process
- 3 Common Challenges and How to Overcome Them
- Wood Filler Performance Comparison
- Product Comparison Table
- Frequently Asked Questions
- Your Floor Transformation Roadmap: Next Steps
Why Patching Before Refinishing Actually Matters
Most DIYers treat patching as an afterthought — something you rush through before the real work begins. That mindset creates expensive problems. According to a 2025 survey by the National Wood Flooring Association (NWFA), nearly 34% of DIY refinishing projects that required rework were traced back to inadequate surface preparation, with improper hole filling being the most cited cause.
Think about what refinishing actually does: sanding removes the top layer of wood, staining penetrates the grain, and finish seals everything in. Any unfilled void becomes a stain trap — absorbing more pigment and creating a dark, obvious patch. Any improperly filled area can shrink during the drying process, leaving a sunken dimple that reflects light unevenly under your polyurethane finish.
The stakes in 2026 are higher than ever. With hardwood flooring costs averaging $8–$14 per square foot installed (up roughly 12% from 2024 due to sustained lumber market pressures), homeowners are investing more heavily in refinishing existing floors rather than replacing them. Getting the prep work right protects a significant financial investment.
“The most common mistake I see is people filling holes right before they stain. You need to patch, sand, check, and sometimes patch again. Rushing that sequence is where floors get ruined.” — Marcus Delray, Certified Wood Flooring Installer, NWFA Member, 2025 interview
Identifying Your Floor Damage: Not All Holes Are Equal
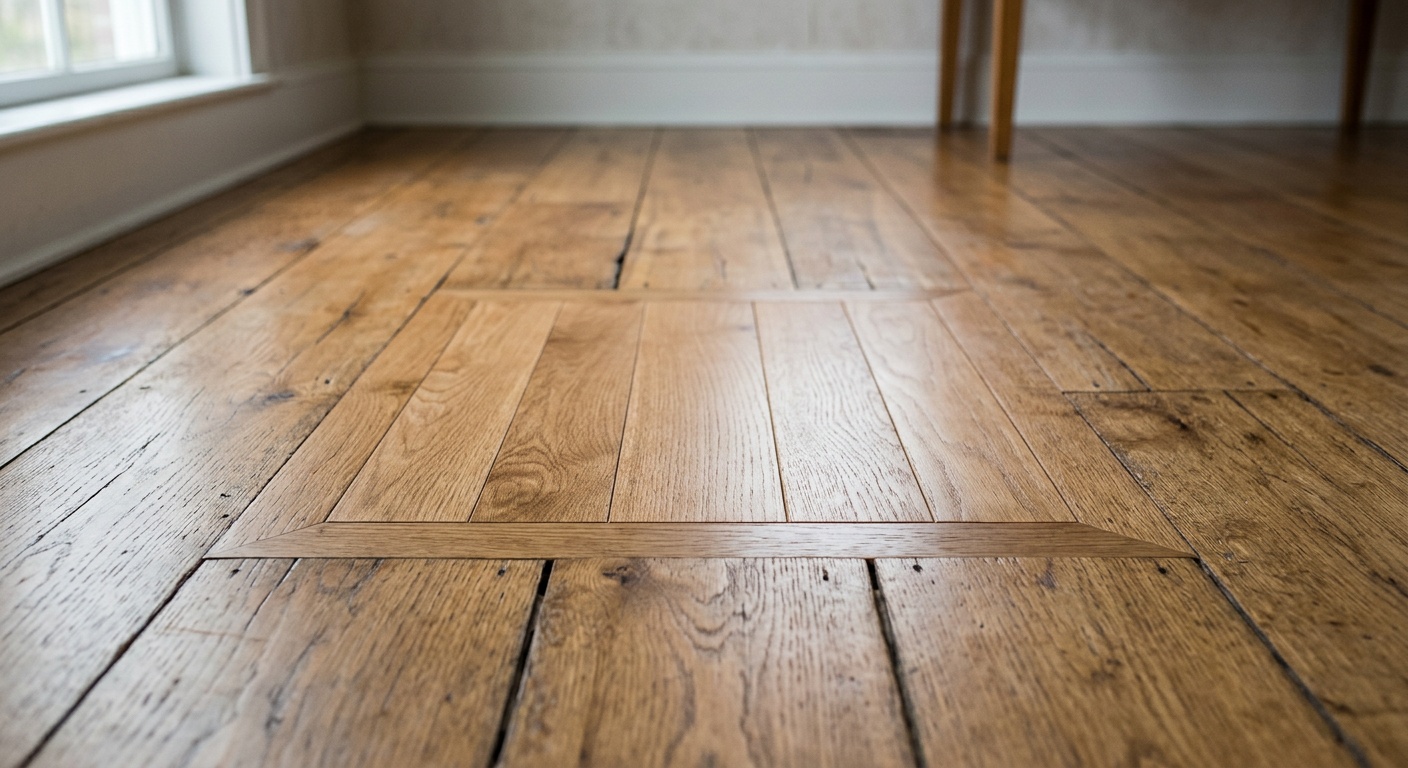
Before you pick up a putty knife, spend 20 minutes on your hands and knees with a flashlight at a low angle. Raking light reveals damage that overhead lighting completely hides. What you’re looking for falls into several distinct categories, each requiring a different approach.
Small Surface Defects (Under 1/4 Inch)
These include nail holes from area rug tack strips, small screw holes, minor pet scratch divots, and hairline cracks between boards. These are the most forgiving repairs. A standard wood filler or wax-based crayon stick applied with a putty knife, allowed to dry, and sanded flush will handle most of these perfectly.
Example: Sarah, a homeowner in Portland, Oregon, was refinishing 800 square feet of Douglas fir floors in her 1940s house in 2026. She had over 200 small tack strip nail holes from decades of area rug use. Using a water-based wood filler tinted to match her fir’s natural honey tone, she batch-filled all 200+ holes in under two hours, sanded them flush the next morning, and achieved seamless results after staining.
Medium Damage (1/4 Inch to 1 Inch)
This category covers deeper gouges, larger screw or bolt holes, localized pet urine damage that has eaten into the wood fiber, and knot holes that have fallen out. Medium damage requires a two-stage approach: an initial fill to build up the depth, followed by a skim coat for surface finishing. Epoxy-based fillers or two-part wood repair compounds work exceptionally well here because they don’t shrink as they cure.
Structural and Plank-Level Damage
If boards are cracked through their width, if sections have rotted from moisture damage, or if large sections are missing, you’re looking at board replacement rather than patching. Attempting to fill structural voids with surface filler leads to repairs that literally crack or collapse underfoot. Know the limit — when the wood itself has lost integrity, replace the plank before refinishing.
Quick Scenario: You’re refinishing a rental property and find a 3-inch section of oak flooring near the bathroom door that’s soft and discolored from years of water exposure. Filler won’t fix that. A skilled installer can sister in a matching replacement board for $80–$150, saving you from a visible, spongy repair that will fail within a year.
Choosing the Right Wood Filler for Your Project
The wood filler market has evolved considerably. In 2026, you have more options than ever — and more opportunities to choose the wrong product. Here’s how to navigate the selection intelligently.
Water-Based Wood Fillers
These are the workhorses of DIY floor repair. Brands like Timbermate, Elmer’s ProBond, and Bona Wood Filler dominate the category. Water-based fillers are sandable, paintable, and stainable — though “stainable” comes with important caveats. Most water-based fillers absorb stain differently than surrounding wood, meaning color matching requires testing before committing.
Best for: Nail holes, small cracks, surface divots up to 1/4 inch deep. Drying time: 30 minutes to 2 hours depending on depth and humidity.
Solvent-Based and Two-Part Epoxy Fillers
For deeper repairs, two-part epoxy wood fillers like PC-Woody or Abatron WoodEpox provide superior structural integrity. They don’t shrink, they cure rock-hard, and they can be drilled, sanded, and shaped once cured. The trade-off: they’re more expensive, require mixing, and have a limited working time (typically 20–45 minutes).
Best for: Gouges over 1/4 inch, missing knots, larger structural repairs. These products are not stainable — plan to paint or use a matching colored product.
Floor-Specific Latex Filler (Flexible)
This is a category many DIYers miss. Standard wood fillers are rigid when cured. Wood floors expand and contract seasonally. In high-movement areas (near exterior walls, across dramatic seasonal humidity changes), a rigid filler can crack out of gaps within months of refinishing. Flexible latex-based floor fillers like DAP Plastic Wood-X or Minwax Wood Filler maintain slight elasticity to accommodate wood movement.
Best for: Cracks between boards in older floors, repairs in climates with significant seasonal humidity swings.
Blended Sawdust Paste (DIY Method)
A time-honored technique: collect the fine sawdust from your own floor sanding (using the drum sander’s first pass) and mix it with clear wood glue or shellac to create a paste. Because this paste is literally made from your floor’s wood, it’s the most natural-looking patch possible — it contains the same grain dust, color variation, and mineral deposits as the surrounding floor. Professional floor finishers in 2026 still swear by this method for hairline cracks and gaps where color matching is critical.
Step-by-Step Patching Process
Now that you know what you’re dealing with and what products to use, here’s the sequence that professional floor finishers follow. Stick to this order and you’ll avoid the most common costly mistakes.
Step 1: Complete Your Initial Sanding Pass First
This surprises most beginners: sand before you patch (for the initial pass). Running your drum sander with 36-grit paper before patching accomplishes two things. First, it reveals the full extent of damage — shallow scratches disappear under coarse sanding, showing you exactly what still needs filling. Second, if you’re making a sawdust paste, you now have perfectly matched sawdust to work with. Complete the rough sanding pass, vacuum thoroughly, and then assess your repairs.
Step 2: Clean and Prepare Each Repair Area
Use a vacuum and then a tack cloth to remove all dust and debris from each hole or crack. For deeper gouges, use a small chisel or utility knife to remove any loose or splintered wood fiber — filler needs to bond to solid wood, not to loose particles. If there’s any oil, wax, or contamination in older holes, wipe with denatured alcohol and allow to dry completely before filling.
Step 3: Apply Filler in Layers for Deep Repairs
For any repair deeper than 1/4 inch, don’t try to fill in one application. Apply filler in layers no more than 1/4 inch thick. Allow each layer to dry fully before adding the next. This prevents the shrinkage cracking and sunken centers that plague single-application deep fills. Use a flexible putty knife to press filler firmly into the void, eliminating air pockets.
For the final layer, overfill slightly — crown the repair above the surrounding floor surface. This accounts for the inevitable shrinkage during drying and gives you material to sand flush.
Step 4: Allow Proper Cure Time
This is where impatience destroys good work. Water-based fillers need a minimum of 4–6 hours for repairs over 1/8 inch deep, regardless of what the label says. In humid conditions (above 65% relative humidity), add another 2–3 hours. Epoxy repairs need 8–12 hours minimum. Test cure by pressing a fingernail firmly into the repair — fully cured filler leaves no indentation.
Step 5: Sand Flush with Progressive Grits
Don’t take a filled repair directly to fine-grit paper. Start with 60-grit on a random orbital sander to bring the repair flush with the surrounding floor. Progress to 80-grit, then 100-grit, feathering the edges of each repair to blend with the surrounding wood texture. The goal is a repair surface that matches the micro-texture of the surrounding floor — not just the height.
Step 6: Test with Stain Before Committing
If you’re staining the floor, test your intended stain color on an inconspicuous repaired area and an adjacent unrepaired area simultaneously. Compare them after 24 hours. Almost all wood fillers absorb stain differently than natural wood. You may need to: use a pre-stain wood conditioner over repairs, choose a slightly different filler product, or adjust your stain technique. Catching this on a test patch rather than discovering it across your entire floor is the difference between a $15 adjustment and a $400 problem.
3 Common Challenges and How to Overcome Them
Challenge 1: Filler Won’t Stay in Wide Plank Gaps
Wide-plank floors (5 inches and wider) are extremely popular in 2026, and they move more dramatically with humidity changes than narrow strip floors. Standard filler applied to gaps between wide planks often cracks and falls out within a single heating season.
Solution: Use a flexible rope caulk or backer rod in wide gaps before applying any surface filler. Insert the backer rod to within 1/8 inch of the surface, then apply a thin layer of flexible latex floor filler over it. The backer rod prevents the filler from being stretched beyond its limits as the planks move. Alternatively, accept that some gaps between wide planks are a feature, not a flaw — many design-forward homeowners in 2026 are leaving natural gaps as part of the floor’s character rather than fighting them.
Challenge 2: Repaired Areas Look Darker After Staining
You fill, sand, stain — and your repairs are now obvious dark spots. This is the single most common complaint in DIY floor refinishing forums in 2026.
Solution: The fix has two components. First, use a pre-stain wood conditioner (Minwax and General Finishes both make excellent versions) applied across the entire floor, including repairs, 15–20 minutes before staining. This partially seals the more porous filler surface and reduces differential absorption. Second, choose a water-based wood filler that’s specifically marketed as “stainable” and test it with your exact stain color before application. The Bona Wood Filler line, relaunched in an expanded color range in late 2024, offers 12 pre-tinted options that match common domestic hardwood species within 1–2 delta-E color units.
Challenge 3: Epoxy Repairs Sand Differently Than Wood
Epoxy filler is significantly harder than wood. When you run a drum sander over an epoxy repair, the surrounding wood sands away faster than the epoxy, leaving the repair raised and obvious — or the sander skips over the repair, leaving it scratched differently than the wood.
Solution: Epoxy repairs should be hand-sanded to near-flush before running any power equipment over them. Use a sanding block with 60-grit paper, working carefully to bring the repair within 1–2mm of the floor surface. Once it’s nearly flush, proceed with normal machine sanding, which will bring everything to final level. This two-phase approach takes more time but eliminates the uneven sanding problem entirely.
Wood Filler Performance Comparison
Here’s a visual comparison of the most popular wood filler types based on four key performance factors relevant to floor refinishing:
Wood Filler Performance Ratings (Scale: 0–100)
Ratings based on 2025–2026 DIY community surveys and professional installer assessments via NWFA forums.
Product Comparison Table: Top Wood Fillers for Floor Refinishing in 2026
| Product | Type | Best Use | Stainable? | Approx. Price (2026) |
|---|---|---|---|---|
| Timbermate Wood Filler | Water-Based | Nail holes, small cracks | Yes (with conditioner) | $18–$24 / quart |
| Bona Wood Filler (Pre-Tinted) | Water-Based | Color-matched repairs | Yes | $22–$30 / quart |
| PC-Woody Epoxy | Two-Part Epoxy | Deep gouges, structural | No (paint only) | $28–$38 / kit |
| DAP Plastic Wood-X | Flexible Latex | Wide planks, seasonal gaps | Yes | $12–$16 / tube |
| DIY Sawdust Paste | Custom Blend | Hairline cracks, color match | N/A (inherently matched) | ~$5–$8 (glue cost only) |
Pro Tips From the Field: What the Best Floor Finishers Actually Do
Beyond the standard procedure, here are the nuanced techniques that separate good floor repairs from invisible ones:
- Tint your water-based filler yourself. Buy neutral-toned filler and add universal tint colorants (available at any paint counter) drop by drop until it matches your floor’s undertone. Test on cardboard and let dry — wet filler is always darker than dried.
- Use a credit card instead of a putty knife for nail holes. The rigid edge of a card lets you wipe exactly flush across small holes without dragging filler out of deeper voids.
- Mark every repaired spot with a small piece of blue painter’s tape before sanding. It’s easy to lose track of 40 repaired holes across 600 square feet. The tape comes right off and ensures you give each spot focused attention during the sanding stage.
- Work in sections by damage type. Fill all the nail holes in one pass, let dry. Then do the gouges. Then the cracks. This batching approach is faster and ensures consistent technique for each repair type.
- Keep a damp rag nearby when applying water-based filler. Excess filler that gets onto the wood surface and dries creates micro-ridges that show under finish. Wipe excess immediately while it’s still wet — it cleans up with water in under 10 seconds.
Frequently Asked Questions
Can I apply wood filler after staining, or does it have to go on before?
Always apply wood filler before staining — never after. Stain penetrates the wood grain and changes the surface chemistry. Filler applied over stained wood won’t bond properly, will look obviously patched, and may peel or crack within months. If you discover a damaged spot after staining, your only real option is to sand the stain out of that area, repair it, apply pre-stain conditioner, restain carefully, and feather the edges to blend. It’s painstaking work that’s entirely avoidable by doing a thorough repair assessment before any stain touches your floor.
How long should I wait after patching before I start the final sanding passes?
The minimum wait for water-based fillers is 4–6 hours for shallow repairs, and 12–24 hours for repairs deeper than 1/4 inch. For epoxy repairs, wait a full 24 hours in normal conditions (70°F, 50% RH). In damp basements or high-humidity environments, extend these times by 50%. The reliable test: press your fingernail firmly into the center of the repair. Fully cured filler will not indent. Rushing this stage is the number one cause of sanded-out repairs that need to be redone from scratch.
My floors have gaps between planks, not just holes — should I fill those too?
It depends on the gap width and what’s causing them. Gaps under 1/16 inch that developed naturally as the floor aged typically don’t need filling — they’ll often close seasonally. Gaps between 1/16 and 1/4 inch in stable sections can be filled with flexible latex filler or a rope caulk product. Gaps larger than 1/4 inch, or gaps that run the length of a board, typically indicate a structural issue (subfloor movement, severe dryness, or improper original installation) that filler alone won’t solve. Filling large structural gaps with rigid filler typically results in the filler being pushed back out as the floor moves. For large-gap situations, consult a flooring professional before refinishing — you may need board re-nailing or humidification system work first.
Your Floor Transformation Roadmap: Ready to Make Those Repairs Invisible?
Patching wood floors before refinishing is fundamentally an act of patience and precision — but it’s also one of the most satisfying stages of any floor restoration project. Here’s your practical action roadmap to carry everything you’ve learned into execution:
- Audit your floor with raking light — spend 30 minutes mapping every defect before buying a single product. Photograph damage areas for reference.
- Match your filler to your damage type — nail holes get water-based, deep gouges get epoxy, movement-prone gaps get flexible latex. Don’t use one product for everything.
- Do your first sanding pass before patching — collect your sawdust, reveal the full extent of damage, and patch from an informed starting point.
- Test stain compatibility on a patched sample — a 6-inch test patch and 24 hours of patience can save you from refinishing failures across hundreds of square feet.
- Sand, inspect under raking light again, and touch up — the best floor finishers do two to three repair passes before applying finish. Don’t settle for “good enough” at this stage.
The broader trend shaping this work in 2026 is clear: restoration over replacement. With hardwood sourcing costs elevated and sustainability increasingly central to home improvement decisions, more homeowners and contractors are investing the time to restore what’s already underfoot. A well-patched, beautifully refinished floor isn’t just aesthetically superior — it’s a financially smart and environmentally responsible choice that can add $3–$5 per square foot to your home’s assessed value according to recent appraisal data from the National Association of Realtors’ 2025 Cost vs. Value Report.
Here’s the question to sit with as you start your project: Are you willing to invest two extra hours in the patching stage to guarantee results that last 15–20 years? Because that’s exactly the trade-off this work represents — and almost every homeowner who’s made it says it was worth every minute.
Your floor has a story. Refinishing it — patches and all — is how you start the next chapter.