How to Repair Peeling Paint on Interior Walls: Your Complete Fix-It Guide
Reading time: 14 minutes
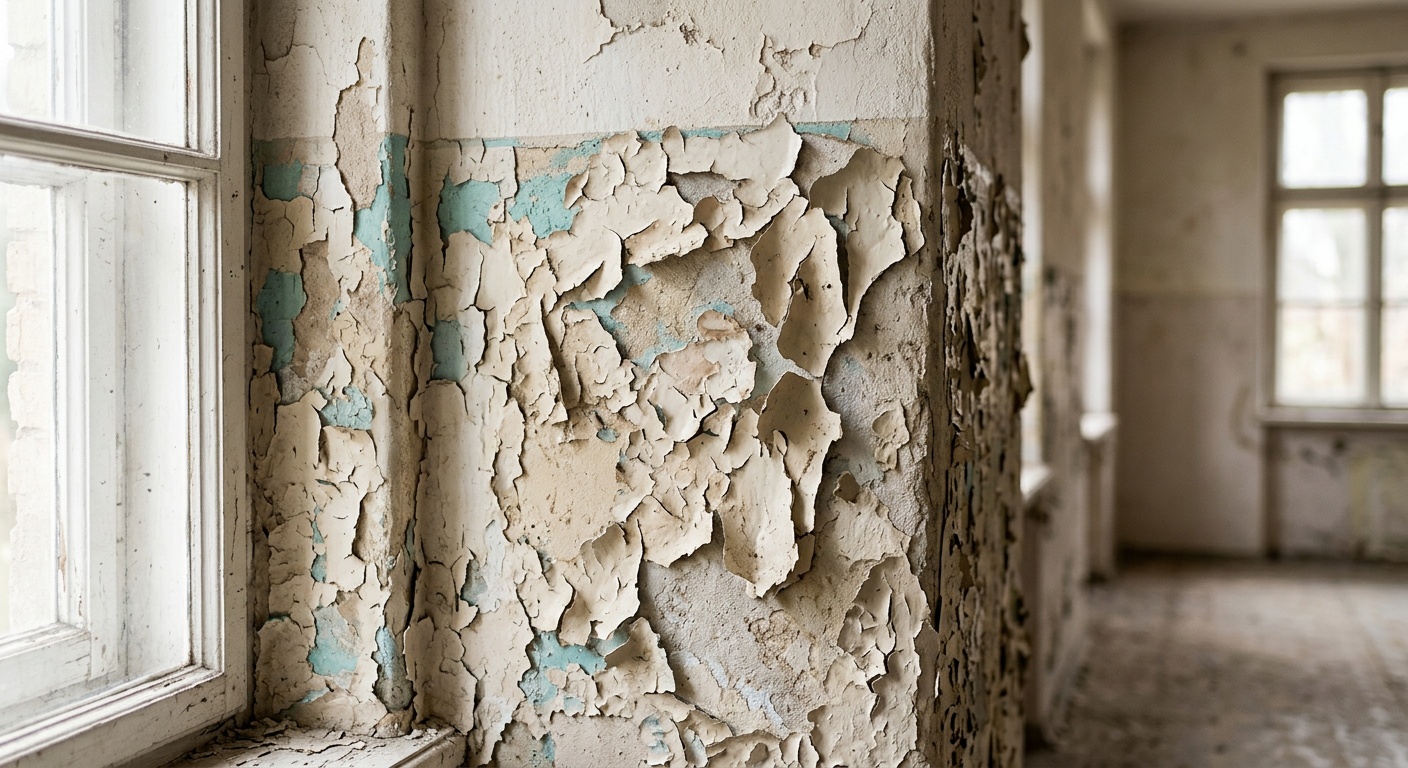
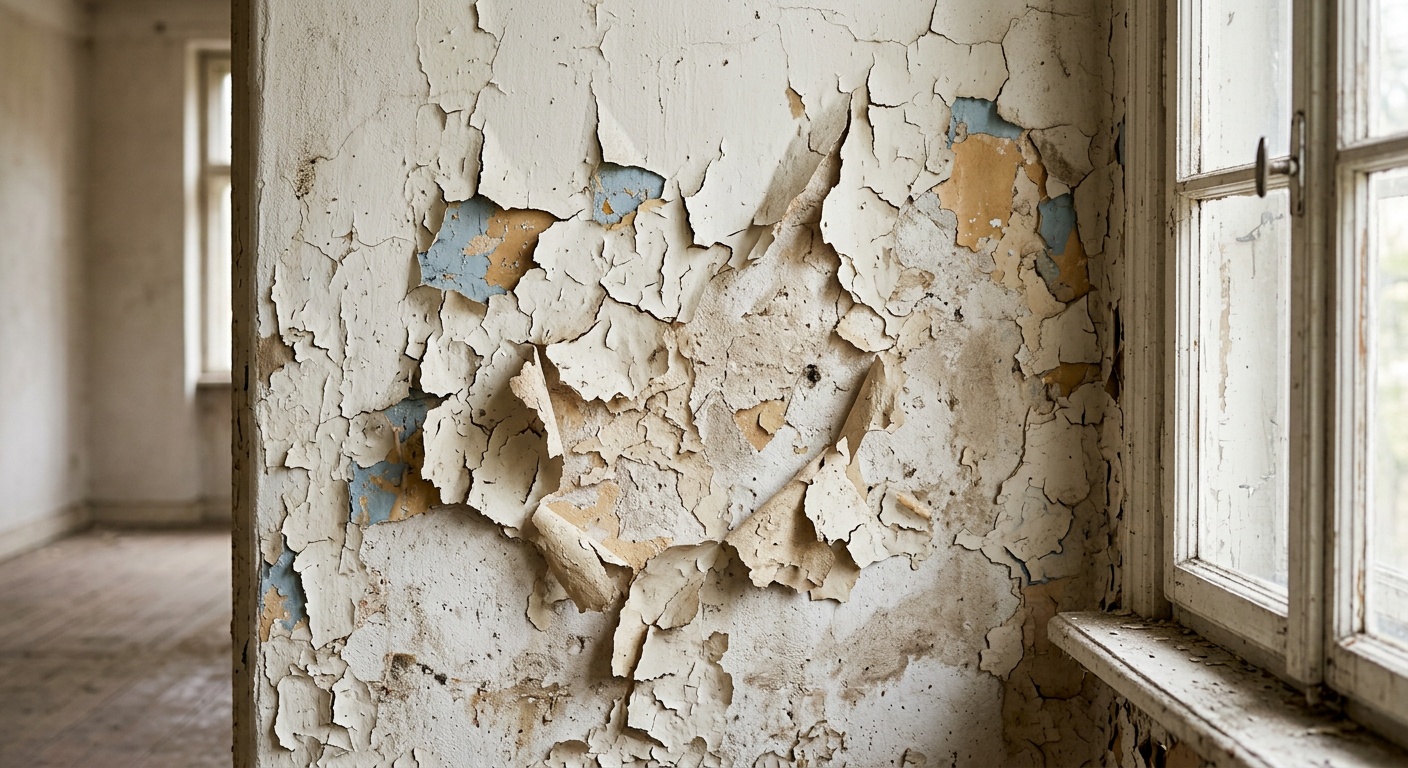
That bubbling, flaking paint on your living room wall isn’t just an eyesore — it’s a signal. Your walls are telling you something’s wrong, and ignoring it almost always makes things worse. Whether you’re dealing with a small patch above the bathroom mirror or entire sections peeling away in your basement, this guide will walk you through exactly what to do, step by step.
Here’s the straight talk: Repairing peeling paint isn’t about slapping on a fresh coat and hoping for the best. It’s about diagnosing the root cause, preparing the surface properly, and applying the right products in the right sequence. Skip any of those steps, and you’ll be back on the ladder six months from now.
In 2026, with rising material costs and more homeowners taking on DIY projects than ever before (the home improvement market hit a record $620 billion globally in 2025), knowing how to tackle peeling paint correctly can save you hundreds — even thousands — of dollars in contractor fees.
Table of Contents
- Why Paint Peels: Understanding the Root Cause
- Tools and Materials You’ll Need
- Step-by-Step Repair Process
- 3 Common Challenges and How to Overcome Them
- Primer and Paint Product Comparison
- Peeling Paint Causes: By the Numbers
- Real-World Examples
- Frequently Asked Questions
- Your Wall Repair Roadmap: Next Steps
Why Paint Peels: Understanding the Root Cause
Before you pick up a scraper, you need to play detective. Peeling paint is always a symptom — not the problem itself. Treating the symptom without addressing the cause is how homeowners end up in an endless cycle of repainting.
The Main Culprits Behind Peeling Paint
Moisture is the number-one villain in most peeling paint scenarios. When water vapor pushes through drywall or plaster from inside a room — think steamy bathrooms, poorly ventilated kitchens, or basement walls — it undermines the bond between the paint and the surface. According to the Indoor Air Quality Association (IAQA), approximately 68% of all interior paint failures reported in 2025 were moisture-related.
But moisture isn’t the only offender. Here’s a quick breakdown of the most common causes:
- Excess humidity and condensation – Especially in bathrooms, laundry rooms, and kitchens
- Poor surface preparation – Painting over dirty, greasy, or glossy surfaces prevents proper adhesion
- Incompatible paint layers – Applying latex paint over old oil-based paint without proper priming
- Skipping primer – Primer is the adhesion bridge between surface and topcoat
- Low-quality paint – Budget paints from 2020 or earlier often lack the binding agents of modern formulas
- Age and natural degradation – Paint applied more than 10–15 years ago simply loses its grip
- Temperature fluctuations – Walls near exterior-facing surfaces experience expansion and contraction
Pro Tip: Run your hand along the peeling area. If the wall feels damp or slightly soft, you have a moisture problem that must be resolved before any painting begins. No amount of quality paint will stick to a wet wall.
Identifying Paint Failure Patterns
The pattern of peeling actually tells you a lot about the underlying cause:
- Alligatoring (cracked, scaly pattern) – Typically signals incompatible paint layers or extreme age
- Bubbling/blistering before peeling – Classic moisture or heat-related failure
- Peeling in long strips – Usually means the surface wasn’t properly cleaned or sanded before painting
- Peeling only near corners or edges – Often linked to condensation points or drywall joint issues
- Random small patches – Could be localized grease, soap residue, or patching compound that wasn’t primed
Tools and Materials You’ll Need
One of the most common DIY mistakes is starting a repair job without having everything on hand. Mid-project hardware store runs break your momentum, extend drying times, and often lead to inconsistent results. Here’s what to gather before you begin:
Essential Tools
- Putty knife or paint scraper (1.5-inch and 3-inch widths)
- Wire brush (for textured surfaces)
- Electric orbital sander or sanding sponges (80-grit and 120-grit)
- Drop cloths and painter’s tape
- Damp rags or sponges
- Paintbrushes (angled 2-inch brush for edges; roller for larger areas)
- Paint tray and roller covers (3/8-inch nap for smooth walls)
- Vacuum with brush attachment
- Safety glasses, dust mask (N95 rated), and gloves
Materials and Products
- Spackling compound or joint compound – For filling holes and smoothing rough edges
- High-adhesion primer – Absolutely essential; don’t skip this
- Interior latex paint – Matched to your existing finish (matte, eggshell, satin, or semi-gloss)
- Degreasing cleaner or TSP substitute – For surface prep in kitchens and high-traffic areas
- Mold-resistant primer – If you’re dealing with bathroom or basement walls
- Caulk – For sealing gaps near trim, windows, or corners
Important note on lead paint: If your home was built before 1978, there’s a real possibility your existing paint layers contain lead. In 2026, the EPA’s Renovation, Repair and Painting (RRP) Rule still applies to DIYers. Purchase a lead test kit (widely available at hardware stores for under $15) and test before sanding or scraping. If lead is present, follow EPA guidelines carefully or consult a certified professional.
Step-by-Step Repair Process
Now that you understand why the paint is peeling and you’ve gathered your supplies, it’s time to get to work. Follow this process in sequence — shortcuts will cost you.
Step 1: Protect the Area and Prep Your Workspace
Lay drop cloths along the base of the wall. Apply painter’s tape along trim, ceiling edges, and any areas you want to protect. Move furniture away from the work zone. Ensure the room is well-ventilated by opening windows and running a fan — this is critical both for your safety during sanding and to help materials dry properly.
Step 2: Remove All Loose and Peeling Paint
Using your putty knife or scraper, firmly but carefully remove all peeling, bubbling, and flaking paint. Work at a 30–45 degree angle against the wall to avoid gouging the surface. Don’t rush this step — any loose paint you leave behind will compromise your repair.
After scraping, use a wire brush on any stubborn textured areas. Then vacuum the entire surface and surrounding floor. This dust removal step is often skipped but significantly improves adhesion quality.
Step 3: Sand the Edges and Feather the Repair Zone
Here’s where most DIYers create their biggest problem: they skip sanding, apply filler, prime, and paint — and end up with a visually obvious patch because the edges are sharp and raised. Feathering is the technique that solves this.
Use 80-grit sandpaper to sand outward from the scraped area, blending the hard edge of remaining paint into the bare wall. Extend your sanding radius about 2–3 inches beyond the scraped zone. Follow with 120-grit for a smoother finish. Wipe away all dust with a damp cloth and allow to dry completely (at least 30 minutes).
Step 4: Clean the Surface
Mix a TSP substitute solution according to package directions and wash down the entire repair area plus a generous surrounding border. This removes grease, soap film, and any invisible contaminants that would inhibit adhesion. Rinse with clean water and allow to dry fully — typically 1–2 hours depending on humidity levels.
Step 5: Fill and Smooth
Apply spackling compound or lightweight joint compound to any gouges, holes, or uneven areas using your putty knife. For shallow scrape marks, a thin skim coat is usually sufficient. For deeper damage, apply compound in two thin layers (allowing each to dry completely) rather than one thick application, which tends to crack as it dries.
Once fully dry, sand smooth with 120-grit paper. Wipe away dust. For large repairs (anything bigger than a dinner plate), consider using mesh tape over the area before applying joint compound to prevent future cracking.
Step 6: Apply High-Adhesion Primer
This is the most important step that DIYers consistently undervalue. A high-adhesion primer (look for products like Zinsser Bulls Eye 1-2-3 or KILZ Adhesion, both still top-rated in 2026) creates the chemical bond that allows your topcoat to stick permanently.
Apply the primer generously over the repaired area, extending at least 4 inches beyond the repair zone. For moisture-prone areas, use a moisture-blocking or mold-resistant primer (Zinsser Mold Killing Primer remains the professional standard in 2026). Allow to dry per manufacturer instructions — typically 1–2 hours for latex primers.
Step 7: Apply Paint in Thin, Even Coats
Cut in along edges with an angled brush first, then roll the larger area. Apply your first coat lightly — it’s not meant to achieve full coverage. Allow it to dry completely (usually 2–4 hours for latex paint), then lightly sand with 220-grit sandpaper to knock down any texture variations. Wipe away dust, then apply your second coat.
In most repair scenarios, two coats of quality paint over properly primed surfaces will deliver seamless, professional results. In high-contrast color situations (very dark to very light, or vice versa), a third coat may be necessary.
3 Common Challenges and How to Overcome Them
Challenge 1: Paint Keeps Peeling Even After Repairs
This is frustrating but almost always traceable to one root cause: unresolved moisture. If you’ve repaired a wall once and it’s peeling again within months, you’re fighting water and losing. The fix requires addressing the moisture source directly — improving bathroom ventilation (install or upgrade an exhaust fan), fixing a slow plumbing leak inside the wall, sealing exterior gaps that let water infiltrate, or installing a dehumidifier in basement spaces. In 2026, smart bathroom ventilation fans with humidity sensors (brands like Broan-NuTone and Panasonic remain market leaders) can automatically activate when humidity spikes, dramatically reducing bathroom paint failure rates.
Challenge 2: Visible Repair Lines After Painting
You’ve done everything right, but you can still see exactly where the repair is. This is a texture-matching problem. Old walls, especially in homes built before 1990, often have knockdown, orange peel, or skip-trowel textures that smooth spackling compound doesn’t replicate. Solutions include:
- Using aerosol texture spray products (Homax Orange Peel or Rust-Oleum Texture Spray) matched to your wall’s existing finish
- Applying joint compound with a texture roller before priming
- For large areas, skim-coating the entire wall section for a uniform surface
Challenge 3: Matching Existing Paint Color
Even with the exact same paint formula, color drift occurs over time due to light exposure, oxidation, and settling of pigment. If your walls are more than 3–4 years old, a direct match will likely look slightly different. The solution: rather than patching just the damaged area, repaint the entire wall from corner to corner. This eliminates visible inconsistencies entirely and is the approach professional painters universally recommend.
Primer and Paint Product Comparison (2026)
| Product | Type | Best For | Avg. Cost (2026) | Rating |
|---|---|---|---|---|
| Zinsser Bulls Eye 1-2-3 | Water-based primer | General interior repairs | $28–$35/qt | ⭐⭐⭐⭐⭐ |
| KILZ Adhesion | High-adhesion primer | Glossy or slick surfaces | $30–$38/qt | ⭐⭐⭐⭐⭐ |
| Zinsser Mold Killing Primer | Mold-resistant primer | Bathrooms and basements | $32–$40/qt | ⭐⭐⭐⭐⭐ |
| Benjamin Moore Aura Interior | Premium latex paint | High-durability finish coat | $72–$85/gal | ⭐⭐⭐⭐⭐ |
| Sherwin-Williams Emerald | Premium latex paint | Moisture-prone rooms | $78–$92/gal | ⭐⭐⭐⭐⭐ |
Peeling Paint Causes: By the Numbers
Based on aggregate data from home inspection reports and contractor surveys compiled in 2025–2026, here are the most common causes of interior paint failure:
Source: Aggregated home inspection and contractor survey data, 2025–2026
Real-World Examples
Case Study 1: The Bathroom That Wouldn’t Stay Painted
Sarah, a homeowner in Portland, Oregon, repainted her main bathroom three times between 2022 and 2024. Each time, the paint above the shower surround began bubbling and peeling within four to six months. The obvious frustration: she was doing everything “right” — or so she thought.
When a contractor finally diagnosed the problem in early 2025, the root cause was a combination of two factors: her existing exhaust fan moved only 35 CFM (cubic feet per minute) of air, far below the 50 CFM minimum recommended for her bathroom size, and she had been painting directly over the old glossy surface without sanding or priming.
The fix cost her $380 total — $190 for a new smart humidity-sensing exhaust fan, $45 in primer and prep materials, and $145 for a gallon of Sherwin-Williams Emerald in a satin finish. That was in March 2025. As of 2026, the walls have held perfectly.
Case Study 2: The Old Paint Layer Problem
Marcus bought a 1962 ranch home in Columbus, Ohio in 2024. Within months of moving in, the living room walls started showing classic alligatoring — a scaly, cracked pattern across large sections. He assumed it was just old paint and attempted a quick scrape-and-repaint.
The result was worse than before. The issue was that the walls had accumulated approximately seven layers of paint over 60+ years, with alternating oil-based and latex layers that had fundamentally different expansion coefficients. Applying another latex coat over this unstable foundation guaranteed failure.
The proper solution, which Marcus executed with professional guidance: strip all paint layers back to bare drywall using a chemical stripper safe for interior surfaces, skim-coat with joint compound, apply a shellac-based primer (Zinsser BIN), and then finish with two coats of premium latex paint. Time-consuming and labor-intensive — but the finished walls in 2026 look flawless.
Frequently Asked Questions
Can I paint directly over peeling paint if the area is small?
No — and this is one of the most tempting shortcuts that reliably fails. Even a small area of peeling paint indicates a localized adhesion failure that painting over will only trap and worsen. The peeling will continue underneath the new paint and will re-emerge, often in a larger area, within weeks or months. The proper approach is always to remove all loose paint, prepare the surface, prime, and then repaint — even for a patch the size of your palm. Taking 30 extra minutes to do it correctly saves hours of repeat work later.
How long should I wait before applying a second coat of paint?
This depends on the specific paint product, but as a general rule for interior latex paints in 2026: wait a minimum of 2–4 hours between coats under normal conditions (65–75°F, 40–60% relative humidity). However, waiting closer to 4–6 hours delivers better results because it ensures the first coat has cured sufficiently rather than just surface-dried. Applying a second coat too soon can cause the first coat to lift or wrinkle. Always check the manufacturer’s recoat window on the paint can label — premium paints like Benjamin Moore Aura specify recoat times that are optimized for their particular formulations.
When should I call a professional instead of DIYing the repair?
DIY repair is perfectly appropriate for most peeling paint scenarios. However, call a professional if: (1) the peeling covers more than 20–25% of a wall, suggesting a systemic moisture or structural issue; (2) you find soft, crumbling drywall behind the peeling paint, which indicates prolonged water damage requiring drywall replacement; (3) your lead test shows positive results and the affected area exceeds 10 square feet; or (4) after repairing the same area twice, the paint continues to fail — indicating an underlying problem that requires professional diagnosis. In 2026, a professional interior painting contractor typically charges $2–$6 per square foot for surface repair and repainting, with most single-room jobs running $400–$900.
Your Wall Repair Roadmap: From Peeling to Pristine
You now have everything you need to tackle peeling paint with confidence. Let’s turn this knowledge into action with a clear, sequenced roadmap:
- Diagnose before you buy anything. Identify the pattern of failure, check for moisture, test for lead if your home is pre-1978, and determine whether you’re dealing with incompatible paint layers. Ten minutes of diagnosis prevents wasted hours of rework.
- Gather your complete toolkit. Don’t start with only half the supplies. The checklist above covers every product and tool you’ll need — shop once, work uninterrupted.
- Address the root cause first. Fix the leaky exhaust fan, seal the condensation source, or repair the plumbing before touching a paintbrush. Cosmetic repairs built on unresolved causes are temporary at best.
- Follow the preparation steps without shortcuts. Scrape completely, feather the edges, clean the surface, fill and skim, and prime with a high-adhesion product. Preparation is 70% of the job — paint is just the final step.
- Paint smart: thin coats, full drying time, proper sequence. Two thin, fully-dried coats over well-primed surfaces will consistently outperform three hasty coats applied in a single afternoon.
As the DIY home improvement trend continues accelerating into 2027 and beyond — driven by both economic pressures and a growing culture of home ownership skill-building — the homeowners who get the best results are those who invest in understanding the why before picking up the tools. Peeling paint repair is a genuinely learnable skill, and once you’ve done it right the first time, you’ll have a process you can repeat with confidence anywhere in your home.
Here’s the question worth sitting with: How many areas of your home have you painted over without addressing what’s underneath? Your walls have been signaling problems — now you have the knowledge to actually listen, and to respond in a way that lasts.