Unclogging a Slow Bathroom Drain Without Harsh Chemicals
Reading time: 12 minutes
That familiar gurgling sound. The water pooling around your ankles in the shower. The sink that takes three minutes to drain after washing your face. If you’ve been there — and honestly, who hasn’t — you know the quiet frustration of a slow bathroom drain. The instinct is to grab a bottle of chemical drain cleaner from under the sink, pour it in, and call it solved. But here’s the straight talk: those chemical solutions come with a cost your pipes, your wallet, and the planet are all quietly paying.
In 2026, more homeowners and renters than ever are looking for smarter, safer alternatives. According to a recent survey by the American Cleaning Institute, over 67% of U.S. households that regularly use chemical drain cleaners report experiencing pipe corrosion or plumbing damage within five years — a stat that should give anyone pause before reaching for that familiar orange bottle.
Good news? You don’t need harsh chemicals to fix a slow drain. You need the right knowledge, a few basic tools, and a willingness to get slightly hands-on. Let’s dive in — strategically, practically, and with your plumbing’s long-term health in mind.
Table of Contents
- Why Drains Slow Down: Understanding the Root Cause
- The Real Risk of Chemical Drain Cleaners
- Tools You’ll Need (Probably Already Have Them)
- Method 1: The Boiling Water Flush
- Method 2: Baking Soda and Vinegar — Done Right
- Method 3: Manual Removal with a Drain Snake or Hook
- Method 4: Plunging the Bathroom Drain
- Method Comparison Table
- Keeping Drains Clear: Long-Term Prevention Strategies
- Frequently Asked Questions
- Your Clear-Drain Action Plan: Next Steps
Why Drains Slow Down: Understanding the Root Cause
Before you can fix the problem, you need to understand what’s actually happening beneath that drain cover. Most slow bathroom drains aren’t mysterious plumbing failures — they’re the predictable result of everyday biological accumulation. Knowing the culprit changes everything about how you approach the solution.
The Usual Suspects Behind a Slow Drain
In a bathroom setting, the most common causes of slow or clogged drains break down into three main categories:
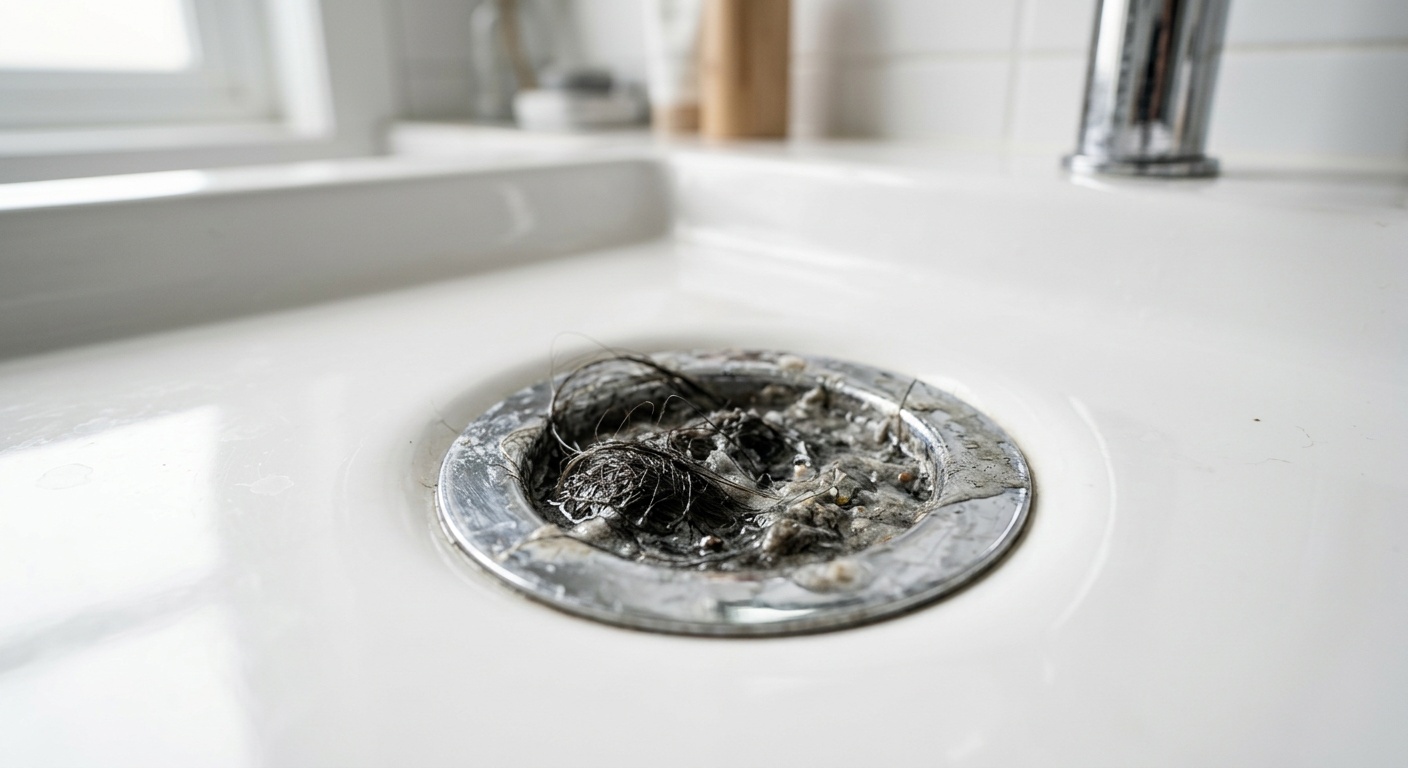
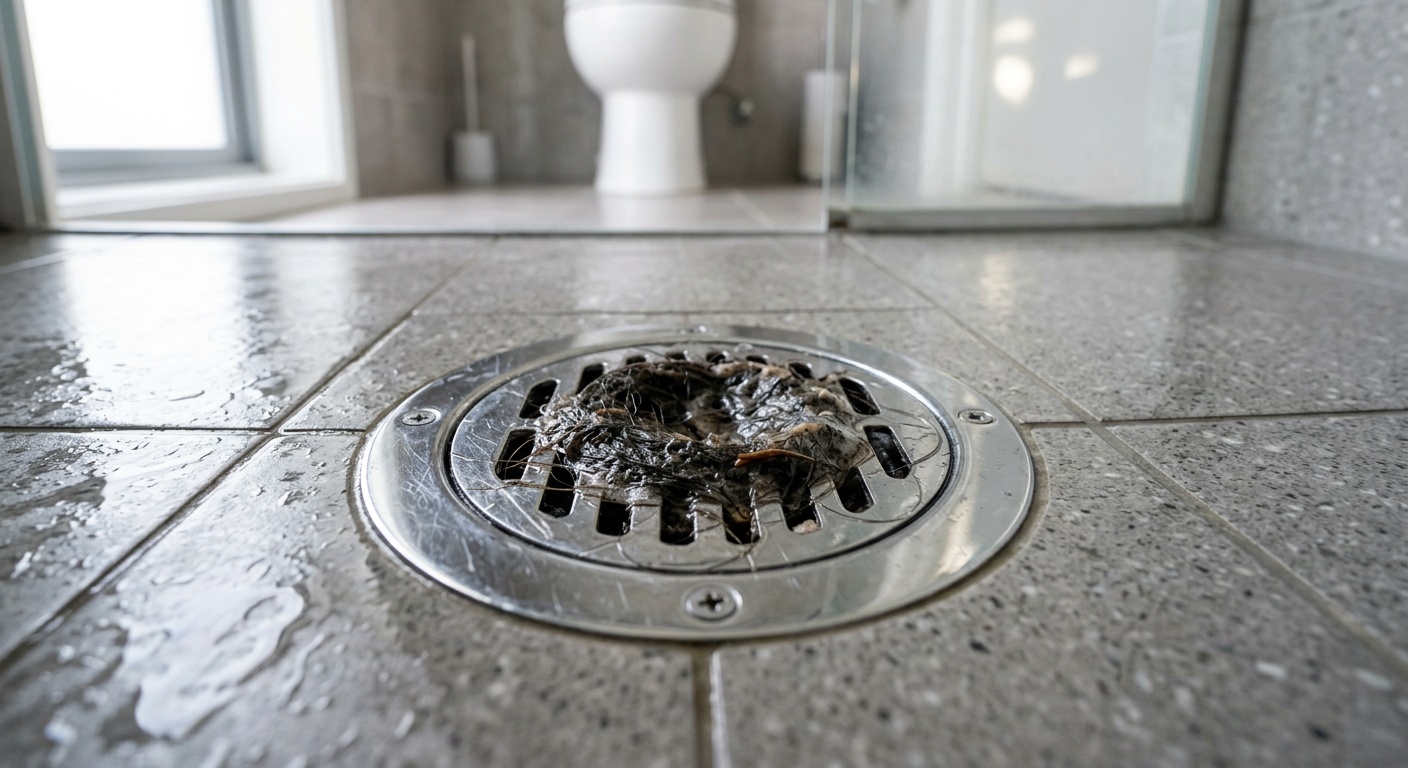
- Hair accumulation: This is the number-one villain in shower and tub drains. A single shower can shed 50–100 hairs, and over weeks, those strands bind together with soap scum to form dense, sticky mats that restrict water flow dramatically.
- Soap scum buildup: Traditional bar soaps contain fats and oils that react with minerals in hard water to form a waxy residue. This residue coats the inside of your drain pipes, narrowing the passage over time.
- Toothpaste, product residue, and skin cells: In bathroom sinks, the accumulated residue from daily grooming routines — toothpaste, shaving cream, skincare products — creates a sticky layer that traps everything else.
- Mineral deposits: In areas with hard water (which affects approximately 85% of U.S. homes, according to 2025 USGS water quality data), calcium and magnesium deposits can build up inside pipes over time, gradually restricting flow.
Is It a Local Clog or a Deeper Problem?
Here’s a diagnostic question worth asking first: Is only one drain slow, or are multiple fixtures affected? If your shower, sink, and toilet are all draining slowly simultaneously, that signals a potential main-line blockage — a situation that warrants a professional plumber. But if it’s just one drain behaving sluggishly, you’re almost certainly dealing with a localized clog that you can absolutely handle yourself.
Quick scenario: Sarah, a homeowner in Portland, Oregon, noticed her bathroom sink draining slowly every few months. Rather than calling a plumber each time, she learned to identify the pattern: soap scum mixed with toothpaste residue was her consistent culprit. Once she understood the cause, the solution became obvious — and chemical-free.
The Real Risk of Chemical Drain Cleaners
Let’s be honest about what’s in those bottles. Most commercial chemical drain cleaners rely on sodium hydroxide (lye) or sulfuric acid as their active ingredients. These compounds generate heat through chemical reactions — sometimes reaching temperatures above 200°F inside your pipes — to dissolve organic material.
That sounds effective, and in the short term, it often is. But the downstream consequences deserve serious consideration:
- Pipe damage: The heat and caustic chemistry that dissolves hair also degrades PVC plastic pipes over time, and can accelerate corrosion in older metal pipes. In 2025, the Plumbing-Heating-Cooling Contractors Association reported that chemical drain cleaner misuse was a contributing factor in approximately 1 in 8 residential pipe replacement calls.
- Environmental impact: These chemicals don’t just disappear. They flow into municipal water systems, and water treatment facilities aren’t fully equipped to neutralize all industrial-grade caustic chemicals. Environmental advocacy groups in 2026 have increasingly flagged lye-based cleaners as a water quality concern.
- Health hazards: Splashback from chemical cleaners can cause serious chemical burns to skin and eyes. The fumes alone can irritate respiratory systems, particularly dangerous in small, enclosed bathrooms.
- False solution syndrome: Chemical cleaners often clear only a portion of the clog, giving the illusion of success while leaving residual material that reforms the blockage within weeks.
The bottom line? Chemical drain cleaners are a short-term fix with long-term costs. The methods we’re about to explore aren’t just gentler — in many cases, they’re more effective at fully resolving the underlying blockage.
Tools You’ll Need (Probably Already Have Them)
One of the best things about chemical-free drain unclogging is that it requires minimal equipment, most of which you likely already own or can find for under $15. Here’s your toolkit:
- Baking soda (sodium bicarbonate) — standard kitchen supply
- White distilled vinegar
- Boiling water (and a kettle or pot)
- Rubber gloves
- A standard cup plunger (flat-bottomed, not the flange style used for toilets)
- A drain snake or hair removal tool (available online or in hardware stores for $5–$20)
- A flashlight
- Paper towels or old rags
- A screwdriver (for removing drain covers)
Pro Tip: Invest in a plastic drain snake — sometimes called a “Zip-It” tool or drain hair catcher wand. These flexible plastic strips with barbed edges are specifically designed to grab and pull hair clogs from bathroom drains. They cost around $5–$8 and are reusable. In 2026, several eco-conscious brands now offer biodegradable versions. This single tool eliminates the need for chemical cleaners in the majority of bathroom drain clog situations.
Method 1: The Boiling Water Flush
Start here. This is your first-line intervention, and it works surprisingly well on soap scum and grease-based clogs that haven’t yet hardened significantly. The concept is simple: heat dissolves fats and temporarily loosens mineral deposits, flushing softer accumulations down the drain.
Step-by-Step Instructions
- Boil a full kettle or pot of water — approximately 2 liters.
- Remove as much standing water from the sink or shower as possible first.
- Carefully pour the boiling water directly into the drain in two or three stages, pausing 30 seconds between each pour. This allows the heat to work progressively through the material rather than just skimming past it.
- Run your tap slowly to check if flow has improved.
- Repeat once more if needed.
Important caveat: This method works beautifully on ceramic, porcelain, and metal drain systems. However, if your home has PVC plastic pipes (common in homes built after the 1980s), avoid using fully boiling water — use very hot tap water instead, around 140–160°F. Repeated exposure to boiling water can warp PVC joints over time. When in doubt, hot rather than boiling is the safer call.
Effectiveness: Best for early-stage soap scum clogs and partial blockages. Less effective on dense hair clogs. Think of this as maintenance-level intervention, or the first step before combining with other methods.
Method 2: Baking Soda and Vinegar — Done Right
You’ve probably heard of this one. But here’s what most guides get wrong: they treat baking soda and vinegar as a magic combination, when in reality, the chemistry requires careful execution to be genuinely effective.
The science: baking soda (a base) reacts with vinegar (an acid) to produce carbon dioxide gas, water, and sodium acetate. The fizzing action creates mechanical agitation that helps dislodge soft blockage material. The alkaline environment also helps break down fatty acids in soap scum.
The Optimized Method
- Start by removing any visible hair or debris from the drain opening manually (use gloves).
- Pour one cup of dry baking soda directly into the drain. Use a funnel if needed to ensure it actually goes into the drain rather than sitting on the surrounding surface.
- Follow immediately with one cup of white distilled vinegar.
- Cover the drain immediately with a drain stopper, wet cloth, or pot lid. This is the step most people skip — and it matters. Covering the drain forces the fizzing reaction downward into the clog rather than allowing it to escape upward.
- Let it sit for 20–30 minutes. Don’t rush this stage.
- Flush with the hottest tap water you can produce (or boiling water if you have metal/ceramic pipes) for a full two minutes.
- Repeat the process if flow has improved but isn’t fully restored.
Case study: Marcus, a renter in Chicago, had a bathroom sink that drained slowly for months. His landlord’s approach was to call a plumber every six months at significant cost. After learning the optimized baking soda-vinegar method, Marcus applied it monthly as preventive maintenance. Within three months, his drain ran at full speed and remained that way. The total monthly cost? Under 50 cents in supplies.
This method is excellent for soap scum, toothpaste residue, and light organic buildup. For dense hair clogs, you’ll want to combine it with Method 3.
Method 3: Manual Removal with a Drain Snake or Hook
Let’s talk about the method that feels least appealing but delivers the most dramatic results: getting the clog out physically. If your slow drain is caused by a hair clog — which is the case for the majority of shower and bathtub drains — no amount of liquid solution will fully dissolve it. Hair doesn’t dissolve readily even in chemical cleaners. It needs to be removed.
Using a Plastic Drain Snake (Recommended First Step)
- Put on rubber gloves. This isn’t glamorous, but it’s necessary.
- Remove the drain cover — most unscrew counterclockwise, or lift off with gentle pressure. Use a flathead screwdriver if needed.
- Use your flashlight to look into the drain. You may be able to see the hair clog just a few inches down.
- Insert the plastic drain snake into the drain and push it down until you feel resistance.
- Rotate the snake slowly as you push to allow the barbs to catch hair fibers.
- Pull upward slowly and steadily. Prepare yourself — what comes out is typically a dense, wet mass of hair, soap scum, and miscellaneous debris. It’s unpleasant and 100% effective.
- Dispose of the clog in the trash (not back down the drain).
- Repeat two or three times until the snake comes back clean.
- Flush with hot water for two minutes to clear any loosened residue.
- Follow up with the baking soda and vinegar method for a thorough clean.
If you don’t have a drain snake, you can fashion a hook from a wire coat hanger — bend the end into a small hook shape and use it to fish out accessible clogs near the drain opening. It’s less effective than a purpose-built snake but works in a pinch.
For bathroom sinks specifically, also check the P-trap — the curved pipe section under the sink. Unscrew it (have a bucket ready), clear any accumulated debris, and replace it. This is often where sink clogs truly live, and it’s a five-minute job that can completely restore drain flow.
Method 4: Plunging the Bathroom Drain
Plunging isn’t just for toilets. A standard cup plunger creates pressure differentials that can dislodge clogs in bathroom sinks and shower drains very effectively — especially for clogs that are partially mobile or positioned lower in the pipe system.
Correct Plunging Technique for Bathroom Drains
- Ensure there is some water in the sink or shower basin — you need at least 1–2 inches to create a proper seal. Add water if necessary.
- For bathroom sinks: block the overflow hole (the small hole near the top rim of the sink) with a wet rag or duct tape. If you don’t, pressure escapes through that hole instead of pushing through the clog.
- Position the plunger cup directly over the drain, ensuring a complete seal around the edges.
- Push down firmly and pull up sharply — don’t just pump randomly. The pulling motion is often more effective at dislodging clogs than pushing.
- Repeat 15–20 times in a consistent rhythm.
- Remove the plunger and check if water drains freely.
- If water rushes out rapidly, follow up with a hot water flush and the baking soda-vinegar treatment to clear residue.
Plunging works best when combined with one of the other methods — particularly after a baking soda-vinegar treatment has softened the clog material, or after manual removal has reduced the clog’s density.
Method Comparison Table
| Method | Best For | Effectiveness | Cost | Time Required |
|---|---|---|---|---|
| Boiling Water Flush | Soap scum, grease | Moderate | Free | 5 minutes |
| Baking Soda + Vinegar | Organic buildup, odors | Moderate–High | Under $1 | 30–45 minutes |
| Manual Drain Snake | Hair clogs (most effective) | Very High | $5–$20 one-time | 10–15 minutes |
| Cup Plunger | Mobile clogs, mid-pipe blockages | Moderate–High | $8–$15 one-time | 10 minutes |
| Chemical Drain Cleaner | Partial clogs (short-term) | Moderate (temporary) | $8–$15 per use | 30–60 minutes |
Effectiveness Comparison: Chemical-Free vs. Chemical Methods
Long-Term Effectiveness Ratings (out of 100)
Ratings based on aggregate data from plumbing industry assessments and homeowner surveys compiled through 2025–2026, measuring long-term clog resolution without recurrence.
Keeping Drains Clear: Long-Term Prevention Strategies
The most effective solution to a slow drain is preventing it from getting to that point in the first place. Prevention isn’t about obsessing over your plumbing — it’s about building a few simple habits that protect your pipes automatically.
Daily and Weekly Habits That Make a Real Difference
- Install drain hair catchers: This is the single most impactful preventive measure you can take. Silicone or stainless steel hair catchers sit over your shower drain and intercept hair before it enters the pipe system. Clean them after every shower. In 2026, several brands now offer magnetic drain catchers that attach invisibly to the drain rim — highly recommended for households where aesthetics matter.
- Weekly hot water flush: Once a week, run the hottest possible tap water through each drain for 60–90 seconds. This helps melt minor soap scum accumulations before they solidify.
- Monthly baking soda treatment: Pour half a cup of baking soda down each drain monthly, let it sit for 15 minutes, then flush with hot water. This controls odors and prevents early-stage organic buildup.
- Switch to liquid soap: Bar soaps are a primary contributor to soap scum buildup. Liquid soaps and body washes produce significantly less residue in your drain pipes. This one small change can noticeably extend the interval between drain cleaning sessions.
- Brush your hair before showering: Brushing removes loose hairs proactively, reducing the amount shed during showering by up to 40%, according to hair care researchers at the University of Leeds (2024).
Seasonal and Annual Maintenance
Beyond daily habits, a twice-yearly deeper maintenance protocol will keep your drains genuinely healthy:
- Every six months, perform the full baking soda and vinegar treatment on all bathroom drains, even those that seem fine.
- Once a year, physically remove and clean your P-traps under bathroom sinks. This takes five minutes and reveals accumulation that surface treatments can’t reach.
- Inspect and clean your drain covers and stoppers — these harbor bacteria and biofilm that contribute to odors and flow restriction over time.
Pro Tip: Keep a dedicated “drain kit” under your bathroom sink: a small bottle of white vinegar, a box of baking soda, rubber gloves, and your plastic drain snake. When everything is in one place, you’re far more likely to act on the first sign of slow drainage rather than waiting until it becomes a full blockage.
Frequently Asked Questions
Is the baking soda and vinegar method actually effective, or is it just a trendy myth?
It’s genuinely effective — but with important caveats. The baking soda and vinegar method works well on soap scum, organic residue, and mild buildup, and is excellent for odor control. Where it falls short is with dense hair clogs, which require physical removal. Think of it as a maintenance and moderate-clog solution rather than an emergency intervention for completely blocked drains. When applied correctly (covering the drain to direct the reaction downward, letting it dwell for 20–30 minutes), it outperforms many chemical alternatives for the types of buildup it targets.
How do I know when a drain problem is beyond DIY and needs a professional plumber?
There are clear indicators that signal professional attention is warranted. If multiple fixtures in your home are draining slowly or backing up simultaneously, you likely have a main sewer line issue. If you’ve used the drain snake multiple times and the blockage returns within days, there may be a structural pipe issue, a deeper root intrusion, or a collapsed section requiring camera inspection. Gurgling sounds coming from drains other than the one you’re running water into, or sewage odors throughout your home, also indicate a systemic issue. In 2026, many licensed plumbers now offer video drain inspection services for around $150–$250 that can diagnose deep pipe problems without invasive digging — worth the investment if DIY methods consistently fail.
Can I use these methods on a completely blocked drain, or only a slow one?
The distinction matters. For a completely blocked drain with standing water that won’t move at all, start with the plunger — it’s your best first option because it works mechanically regardless of what’s in the pipe. Follow that with manual removal using a drain snake once you’ve restored partial flow. The baking soda and vinegar method is most effective when water can still move through (however slowly), as the treatment needs to reach and interact with the clog material. Boiling or hot water alone is rarely sufficient for a complete blockage and should be used as a follow-up step. For stubborn, complete blockages that don’t respond to any of these methods after two attempts, professional help is the right call — continued aggressive DIY attempts can sometimes worsen the situation or damage pipe joints.
Your Clear-Drain Action Plan: Next Steps
You now have everything you need to tackle a slow bathroom drain without reaching for a single bottle of harsh chemicals. Here’s your practical roadmap — start now, build habits that last.
- ✅ This week: Identify your drain’s culprit (hair, soap scum, or both) and perform either the drain snake method (for hair) or the baking soda-vinegar treatment (for soap scum buildup). Don’t wait for the drain to worsen.
- ✅ This month: Purchase and install silicone hair catchers on every shower and bathtub drain in your home. This single step eliminates the root cause of the majority of bathroom clogs.
- ✅ Every month: Run the baking soda maintenance treatment on all bathroom drains, even those that seem clear. Prevention is exponentially easier than cure.
- ✅ Every six months: Perform a complete drain maintenance session — snake inspection, P-trap cleaning under sinks, and a thorough baking soda-vinegar treatment on all bathroom fixtures.
- ✅ Going forward: Build the “drain kit” under your sink so you’re always prepared to act at the first sign of slow drainage.
The broader trend here is significant: in 2026, sustainable home maintenance is no longer a niche concern — it’s mainstream practice. As more municipalities tighten restrictions on chemical drain cleaner formulations (several states have proposed regulatory reviews for 2027), the skills you’ve just learned will become increasingly valuable. Taking care of your plumbing without chemistry isn’t just good for your pipes — it’s a small but meaningful contribution to cleaner waterways and healthier homes.
Here’s the question worth sitting with: How many chemical products in your home could be replaced by a little know-how and a few basic tools? Your bathroom drain is a good place to start — but it’s rarely the last place this thinking leads.