Best Concrete Finishes for Your Outdoor Patio in 2026
Reading time: 12 minutes
You’ve finally decided to transform that bare, uninspiring slab outside your back door into something worth lingering over with a morning coffee. Smart move. But here’s the challenge most homeowners hit almost immediately: concrete finishes are no longer a two-option game. The industry has exploded with innovation, and choosing the wrong finish can mean cracking, fading, costly repairs — or simply a patio that looks like a parking lot.
The good news? With a little strategic guidance, you can match the right finish to your lifestyle, climate, and aesthetic goals without second-guessing yourself every step of the way. Let’s navigate this together.
Table of Contents
- Why the Right Concrete Finish Actually Matters
- The Top Concrete Finishes for Outdoor Patios in 2026
- Side-by-Side Comparison: Finishes at a Glance
- 2026 Homeowner Popularity Chart
- Real-World Examples: What Works and Why
- Common Challenges and How to Overcome Them
- DIY vs. Professional Installation
- Frequently Asked Questions
- Your Patio Transformation Roadmap
Why the Right Concrete Finish Actually Matters
Let’s cut through the noise: a concrete finish isn’t just cosmetic. It’s a functional layer that directly affects how long your patio lasts, how safe it is underfoot, how much maintenance you’ll do every year, and ultimately how much value it adds to your property. According to the National Association of Realtors’ 2025 Remodeling Impact Report, a well-finished outdoor patio recoups an average of 72% of its installation cost in home resale value — a figure that climbed 8% from the previous year.
Think about your specific environment. Are you in a freeze-thaw climate like Chicago or Denver? A polished finish might look stunning in a showroom but crack within two winters. Live in Phoenix or Miami? UV degradation and heat absorption become your primary concerns. The finish you choose needs to answer these environmental questions before it answers aesthetic ones.
Here’s the straight talk: the “best” finish doesn’t exist in a vacuum — it exists in the context of your patio’s dimensions, your local climate, your foot traffic levels, and your realistic maintenance commitment. What we’ll do in this article is give you the framework to make that decision with confidence.
The Top Concrete Finishes for Outdoor Patios in 2026
1. Exposed Aggregate Finish
Exposed aggregate has experienced a massive resurgence in 2026, and for good reason. This finish involves removing the top layer of cement paste to reveal the natural stones, pebbles, or decorative glass embedded within the mix. The result is a naturally textured surface that provides excellent slip resistance — a critical feature for pool surrounds, steps, and rainy climates.
Key advantages:
- Exceptional slip resistance due to natural texture
- Highly durable — properly sealed exposed aggregate can last 25–30 years
- Low maintenance compared to stamped alternatives
- Natural aesthetic that blends beautifully with landscaping
- Hides minor surface imperfections and wear over time
The 2026 trend leans toward locally sourced aggregates — river pebbles, crushed granite, and recycled glass — which adds a regional authenticity that resonates with homeowners conscious about sustainability. Contractors in the Pacific Northwest are reporting that over 40% of their patio requests in early 2026 specifically request recycled glass aggregate for its visual pop and eco-credentials.
Cost range: $8–$18 per square foot installed, depending on aggregate material and regional labor rates.
2. Stamped Concrete Finish
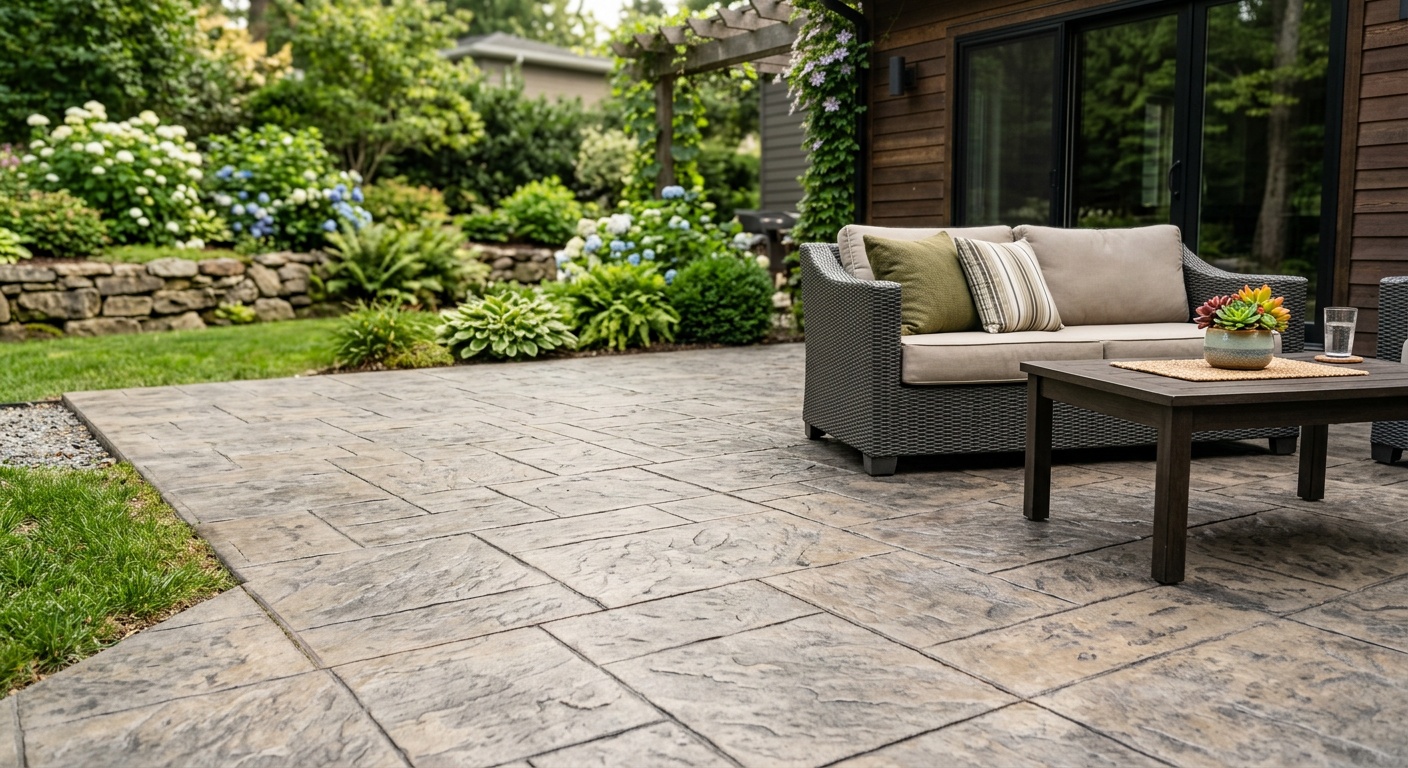
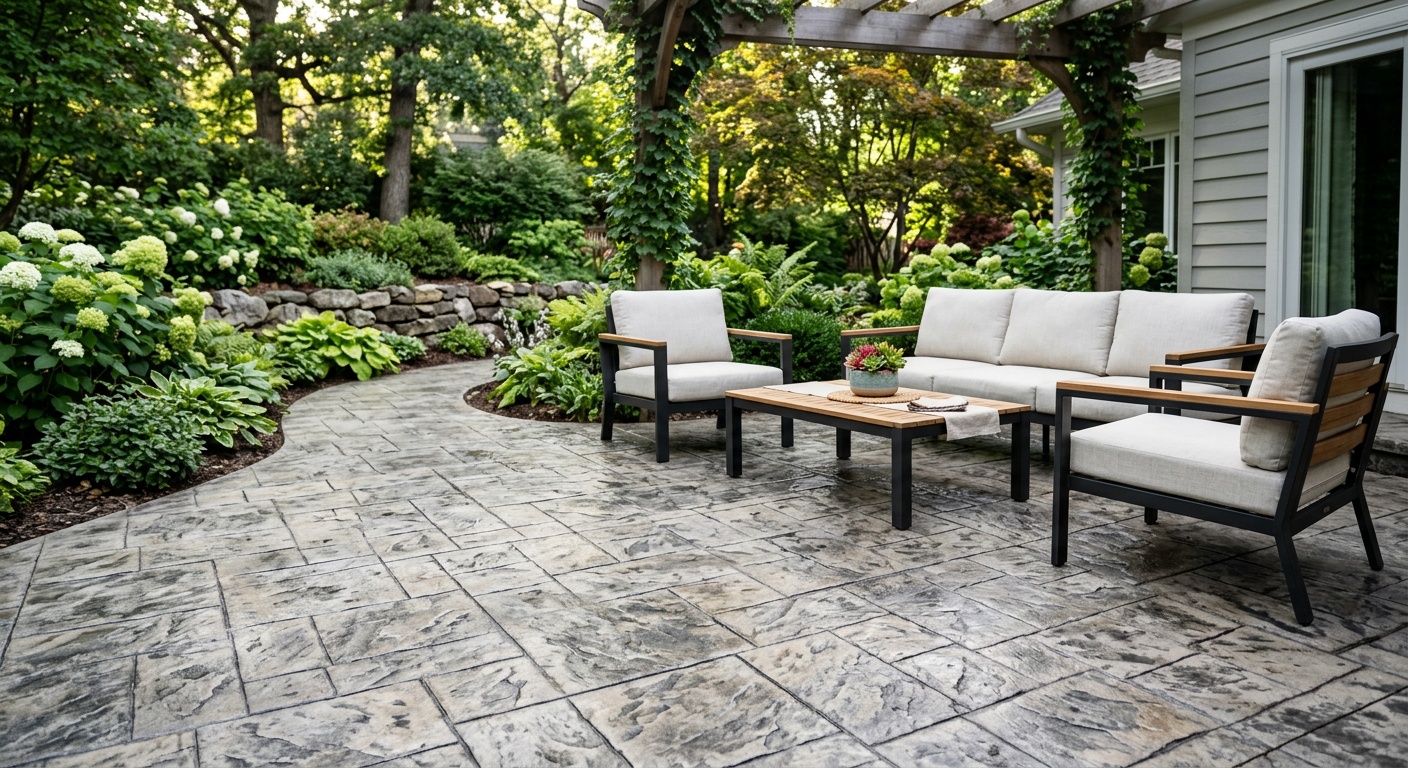
Stamped concrete remains one of the most popular choices nationally, offering the visual richness of natural stone, slate, brick, or wood planks at a fraction of the material cost. Using textured rubber mats pressed into freshly poured concrete, contractors create remarkably convincing patterns that elevate curb appeal dramatically.
Popular 2026 patterns include:
- Ashlar Slate — clean geometric lines with natural stone texture
- Herringbone Brick — classic and timeless, works with traditional homes
- Random Stone — organic, irregular shapes with a natural feel
- Wide-Plank Wood Grain — trending heavily in 2026 for its warmth
- Cobblestone — adds old-world European charm to outdoor entertaining areas
The caveat with stamped concrete? It requires regular resealing — typically every 2–3 years — and can become slippery when wet unless an anti-slip additive is included in the sealer. In freeze-thaw climates, the sealer layer is the primary defense against water infiltration and cracking, so skipping maintenance genuinely shortens the patio’s lifespan.
Cost range: $12–$25 per square foot installed, with intricate multi-color patterns reaching $30+.
3. Broom Finish (Brushed Concrete)
Don’t underestimate the humble broom finish. While it may sound basic, a properly executed broom finish — where a stiff brush is dragged across freshly poured concrete to create fine parallel grooves — is one of the most practical, cost-effective, and durable options available.
It’s the workhouse finish for a reason: excellent traction in all weather conditions, straightforward installation, and a clean look that complements modern and transitional home styles. In 2026, designers are pairing broom-finished patios with bold furniture, vibrant plantings, and statement lighting to let the space do the decorative heavy lifting rather than the surface itself.
Cost range: $5–$10 per square foot installed. One of the most budget-friendly options on the market.
4. Stained Concrete Finish
Concrete staining has evolved considerably. Acid staining creates rich, variegated earth tones through a chemical reaction with the concrete’s mineral content, producing a mottled, almost marbled appearance that’s genuinely unique — no two acid-stained patios look the same. Water-based acrylic stains, on the other hand, offer a broader color palette and more predictable results, which is why they’re increasingly popular with homeowners who want precise color matching.
In 2026, two-tone and multi-zone staining has become a significant design trend — applying different colors to defined areas of a patio to visually delineate a dining zone from a lounging area, for instance. When combined with a quality polyurethane or epoxy topcoat, stained concrete is both beautiful and surprisingly resilient.
Cost range: $7–$20 per square foot depending on stain type, number of colors, and topcoat selection.
5. Concrete Overlay and Microtopping
This category deserves special attention in 2026 because it’s the go-to solution for homeowners with existing concrete that’s structurally sound but visually tired, stained, or dated. Concrete overlays — thin polymer-modified cement layers applied over existing slabs — allow you to essentially “re-skin” your patio without the cost and disruption of full demolition and replacement.
Microtoppings, the ultra-thin variant (typically 1/16 to 1/8 inch thick), create a sleek, seamless, almost terrazzo-like surface that’s extremely popular in contemporary and minimalist design contexts. They require a skilled applicator and a well-prepared substrate, but the results can be genuinely stunning.
Cost range: $5–$15 per square foot for standard overlays; $15–$30 for premium microtoppings with decorative scoring or coloring.
6. Salt Finish
A salt finish is created by pressing coarse rock salt into freshly poured concrete and then washing it away once the concrete sets, leaving behind a pitted, pockmarked texture with a subtle, rustic character. It’s particularly popular in warmer climates and around pools because the texture provides slip resistance without aggressive abrasiveness.
Note: salt finishes are not recommended for freeze-thaw climates — water infiltrating those pockets and freezing causes accelerated surface deterioration. If you’re in the Sun Belt, however, it’s an economical and attractive option.
Cost range: $5–$12 per square foot installed.
Side-by-Side Comparison: Finishes at a Glance
| Finish Type | Cost/sq ft | Durability | Slip Resistance | Maintenance Level | Best Climate |
|---|---|---|---|---|---|
| Exposed Aggregate | $8–$18 | ⭐⭐⭐⭐⭐ | Excellent | Low | All climates |
| Stamped Concrete | $12–$30+ | ⭐⭐⭐⭐ | Moderate | Medium-High | Mild climates |
| Broom Finish | $5–$10 | ⭐⭐⭐⭐⭐ | Excellent | Very Low | All climates |
| Stained Concrete | $7–$20 | ⭐⭐⭐ | Low–Moderate | Medium | Mild to warm |
| Concrete Overlay | $5–$30 | ⭐⭐⭐⭐ | Moderate | Medium | All climates |
2026 Homeowner Popularity by Finish Type
Based on survey data compiled from over 4,200 U.S. homeowners who completed outdoor patio projects in 2025–2026, here’s how finish preferences break down nationally:
Source: Outdoor Living Industry Survey, Q1 2026. Sample size: 4,214 U.S. homeowners.
Real-World Examples: What Works and Why
Case Study 1: The Denver Freeze-Thaw Challenge
In early 2025, the Hartman family in Denver’s Wash Park neighborhood had their existing stamped concrete patio ripped out after just six years — the sealer had failed during a particularly harsh 2024–2025 winter, and freeze-thaw cycling had caused widespread surface spalling and cracking. Their contractor recommended switching to an exposed aggregate finish using locally quarried Colorado river rock.
The result? Eighteen months later, the patio looks as solid as the day it was poured. The aggregate texture provides natural drainage channels that reduce water pooling, and without a continuous sealer layer trapping water, freeze-thaw damage is dramatically reduced. The Hartmans did opt for a penetrating silane-siloxane sealer — applied to the interior of the concrete rather than forming a surface film — which protects against moisture infiltration without creating a surface that can delaminate.
The lesson: In freeze-thaw climates, surface texture and penetrating sealers beat decorative surface coatings every time.
Case Study 2: The Austin Renovation Success
Maria Gonzalez in Austin, Texas faced a different problem in 2026: a 12-year-old concrete patio that was structurally fine but deeply stained from years of outdoor cooking, furniture rust rings, and faded original coloring. Full replacement quotes came in at $14,000–$18,000. A decorative concrete specialist instead proposed a two-step overlay system: first a skim coat to repair surface blemishes, then a microtopping in a warm terracotta tone, scored with a geometric grid pattern and finished with a UV-stable topcoat.
Total cost: $4,200. The transformation was dramatic — the patio went from an eyesore to a showpiece, and the UV-stable topcoat was specifically chosen to withstand Austin’s intense summer sun without yellowing or peeling. Maria reports zero maintenance issues through the first Austin summer, which included a streak of 22 days over 100°F.
The lesson: Don’t automatically default to demolition. A quality overlay system can deliver transformative results at a fraction of the replacement cost — especially in stable climates.
Case Study 3: The Pacific Northwest Pool Surround
The Chen family in Portland, Oregon needed a pool surround that could handle constant moisture, barefoot traffic, and the aesthetic requirements of their modern landscape design. Their contractor proposed a salt finish — which was quickly ruled out given Portland’s occasional freezing temperatures — in favor of a light-colored exposed aggregate with white marble chips and quartz, combined with strategic band lines of smooth brushed concrete for visual definition.
The textured aggregate provides barefoot-friendly grip around the pool, the lighter color minimizes heat absorption on summer days, and the marble chips reflect light beautifully. Two years on, it remains one of the contractor’s most-photographed projects.
The lesson: Hybrid approaches — combining finishes within a single patio — often deliver the best of multiple worlds.
Common Challenges and How to Overcome Them
Challenge 1: Cracking
Concrete cracks. This is not a flaw — it’s physics. The key is controlling where and how cracking happens. Control joints (intentional cuts or grooves in the concrete at regular intervals) allow the slab to crack along predetermined lines rather than randomly across your beautiful finish.
Pro Tip: Ensure your contractor installs control joints at intervals no greater than 2–3 times the slab thickness in feet. For a standard 4-inch slab, that means joints every 8–12 feet. If you’re getting a stamped finish, insist that control joints are incorporated into the pattern design so they’re visually invisible.
Challenge 2: Color Fading and UV Degradation
Integral color (pigment mixed into the concrete) is far more fade-resistant than surface-applied color. If you’re choosing a stained or colored overlay finish, always specify a UV-stable topcoat — particularly critical in high-sun regions. In 2026, nano-ceramic topcoats have become increasingly accessible at the consumer level and offer superior UV protection and surface hardness compared to traditional polyurethane sealers.
Resealing frequency depends on traffic and climate, but a practical rule of thumb: check your sealer annually by dropping water onto the surface. If it beads up, you’re protected. If it absorbs, it’s time to reseal.
Challenge 3: Choosing a Contractor
Decorative concrete is a specialized skill. A contractor who excels at structural flatwork may produce disappointing results with stamped or stained finishes. When vetting contractors in 2026, ask specifically to see portfolios of the finish type you want, request references from projects at least three years old (so you can assess long-term performance), and verify they hold certification through the American Society of Concrete Contractors (ASCC) or the Decorative Concrete Council (DCC).
Get minimum three quotes, and be skeptical of any price that’s dramatically below market rate — decorative concrete done cheaply is worse than basic concrete done well.
DIY vs. Professional Installation
Here’s an honest breakdown for those considering the DIY route:
Realistically DIY-able:
- Applying a concrete stain to an existing clean, prepped slab
- Applying a concrete resurfacer/overlay product (with careful surface prep)
- Resealing an existing finished patio
Leave to the professionals:
- Stamped concrete (timing during pour is critical — errors are permanent)
- Exposed aggregate (washing timing requires experience)
- Microtoppings (substrate preparation and application technique are highly skill-dependent)
- Any new pour with proper sub-base preparation and control joint placement
The 2026 landscape includes a growing library of high-quality DIY overlay and stain products from brands like Rust-Oleum’s RockSolid line, Quikrete’s Concrete Resurfacer, and newer entrants like Rhino Shield Exterior — but even these perform best when surface preparation is done correctly. Proper prep (cleaning, etching, crack repair) accounts for roughly 80% of a successful DIY concrete project outcome.
Frequently Asked Questions
What is the most durable concrete finish for an outdoor patio in a harsh climate?
For regions experiencing significant freeze-thaw cycling — think the Midwest, Northeast, and Rocky Mountain states — exposed aggregate with a penetrating silane-siloxane sealer is consistently the most durable choice. The textured surface doesn’t rely on a surface sealer film that can delaminate, and the natural stone aggregate embedded in the concrete is inherently frost-resistant. Broom-finished concrete with proper control jointing and a penetrating sealer is an excellent and more economical runner-up. Both outperform stamped concrete in harsh cold climates when long-term durability is the primary concern.
How often does a stamped concrete patio need to be resealed, and what happens if I skip it?
Stamped concrete in moderate climates typically needs resealing every 2–3 years; in high-UV or high-traffic environments, annually is not excessive. Skipping resealing allows water, oils, and UV radiation to penetrate and degrade both the color and the surface layer. In freeze-thaw climates specifically, an unsealed stamped surface allows water to infiltrate the patterned texture, freeze, expand, and cause progressive delamination and spalling. The cosmetic decline is noticeable within a season; structural surface damage can follow within 2–3 winters. Resealing is genuinely one of the highest-ROI maintenance tasks for decorative concrete.
Can I change my concrete finish without replacing the entire slab?
In most cases, yes — provided your existing slab is structurally sound (no deep cracking, settlement, or heaving). Concrete overlays and microtoppings applied over existing slabs allow a complete visual transformation without demolition. Staining is also effective on existing concrete, though results depend on the original concrete’s composition and any previous sealers applied. The critical caveat: any existing sealer must be fully removed before staining or overlaying, which typically requires mechanical grinding or chemical stripping. Have a decorative concrete specialist assess your existing slab before committing to an overlay approach — they can identify whether the substrate is a suitable candidate and what surface preparation will be required.
Your Patio Transformation Roadmap: Next Steps
You’ve covered the terrain — now let’s translate knowledge into action. Here’s a practical roadmap to move from research to a finished patio you’ll genuinely love:
- Assess your climate first. Before anything else, look up your region’s average freeze-thaw cycles and annual UV index. These two factors will immediately eliminate or elevate certain finishes and should be the first filter you apply.
- Define your maintenance commitment honestly. Beautiful stamped concrete with zero resealing attention is a recipe for disappointment. Be realistic about how much ongoing upkeep you’ll actually do, and let that guide your finish selection.
- Get three contractor quotes with portfolio reviews. Specifically request photos of projects using your preferred finish that are at least 3 years old. Ask about their control joint strategy and sealer specifications.
- Request a sample board or mock-up. Reputable decorative concrete contractors will often create a small sample of your chosen finish and color combination. Don’t skip this step — colors look dramatically different outdoors in your specific lighting conditions.
- Budget for long-term maintenance from day one. Factor in the cost of resealing every 2–3 years when comparing options. A $20/sq ft stamped finish with $3/sq ft biennial resealing costs more long-term than a $10/sq ft exposed aggregate with minimal maintenance.
The broader trend shaping outdoor living in 2026 is the increasing expectation that exterior spaces function as true extensions of the interior home — places designed for comfort, beauty, and longevity rather than as afterthoughts. Your concrete finish choice is the literal foundation of that vision.
So here’s the question worth sitting with: in five years, do you want to be resealing a stamped pattern that’s still turning heads — or wrestling with a cracked, faded surface that’s due for replacement? The decision you make today, informed and intentional, is the one that answers that question.